camper trailers tech tips

Ian & Edythe's Kitchen


IAN & EDYTHE'S KITCHEN

Ian Wilkin


    Having had several requests for information about our kitchen perhaps it’s time I set to and put something together.

    As it was installed when we got our pre-loved Trek Bwana. I can’t take credit for the design or build but I have made some mods which I believe are improvements.

    It is not the standard kitchen unit that Trek supply. The original owner (a builder) said he'd had it built I assume by a cabinet maker.
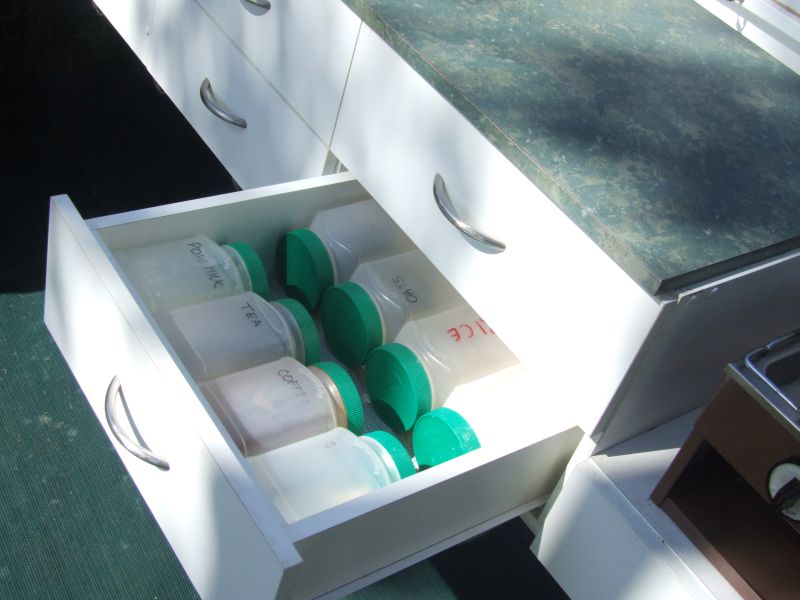
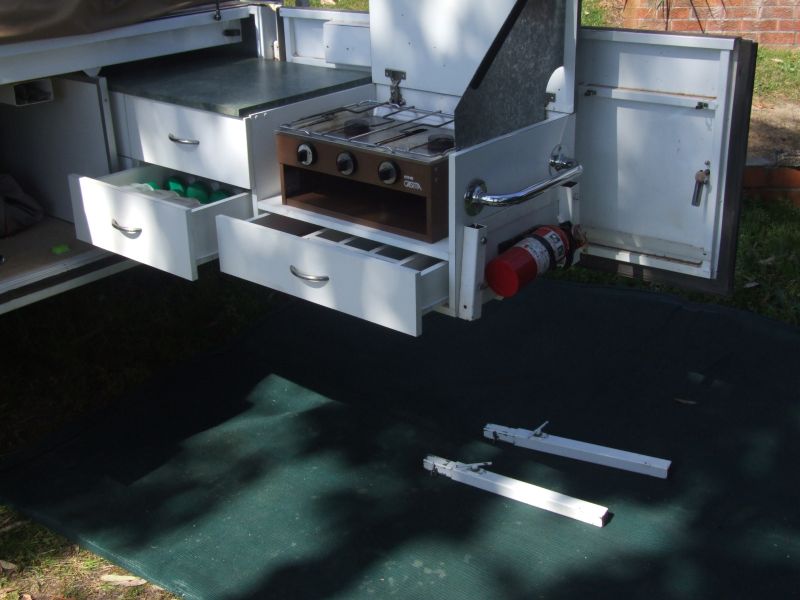
    When you think about it some of the priorities are convenience, storage space, robustness and weight. We find the first three are met well but at 50kg on the two outside legs it would be nice to have a bit less weight.

    I hope the pictures will save many words but if you would like any info that I have not covered please ask, I would be happy to help.
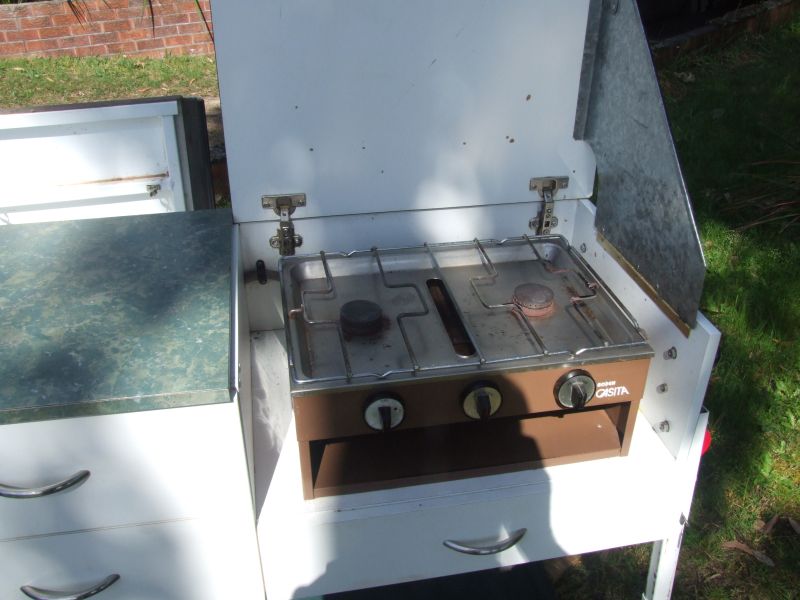
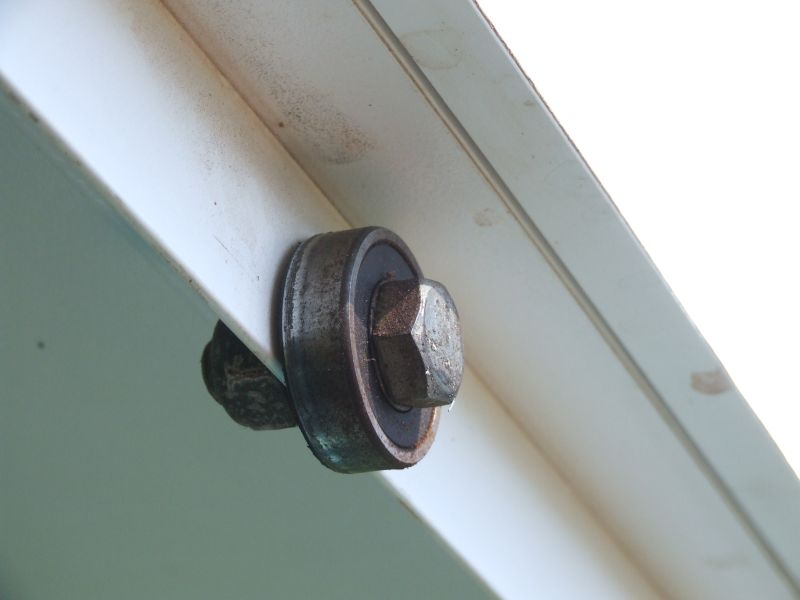
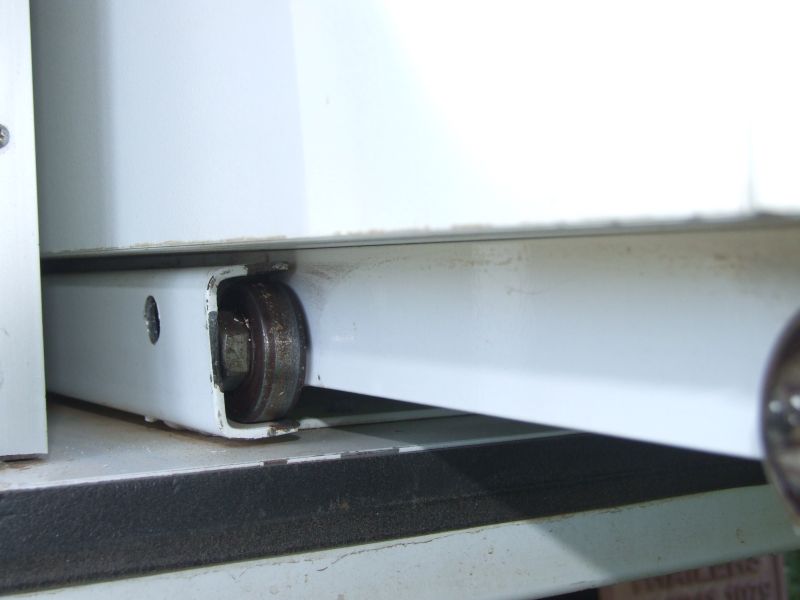
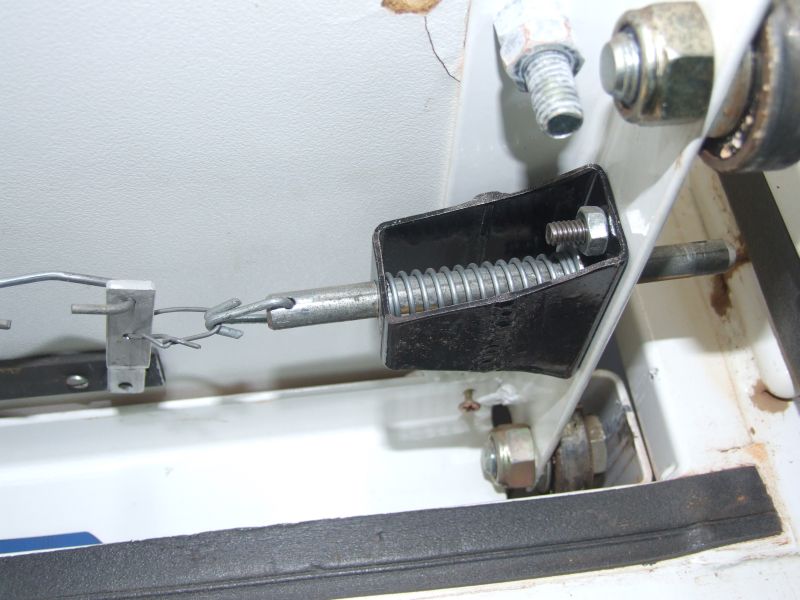
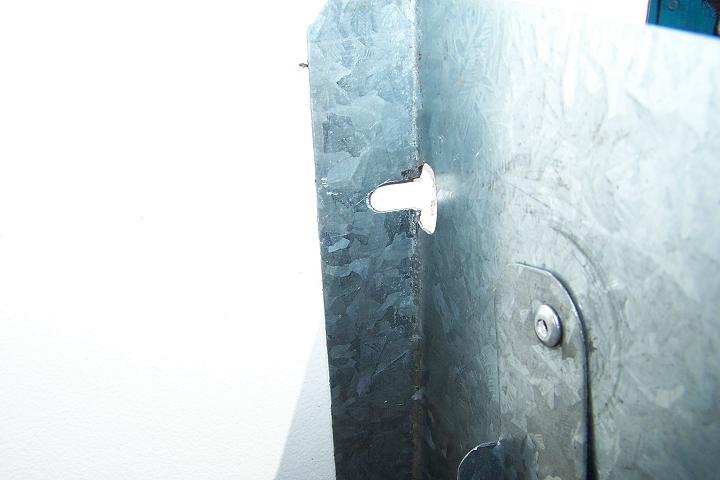
    Briefly the unit is almost the length of the trailer and slides in and out from the tail gate I will describe the mechanism later. Constructed from 12mm Melamine coated particle board except for the bench top which is Laminex covered. Being located on the right hand side of the trailer, when in place it is out of the way at the end of the canopy leaving a maximum of free space.


   One of the first things you notice is the large bench top under which are five drawers.


    Part of the bench at the right hand end hinges up for access to the gas stove and part of the bench at the left hand end hinges up to give access to what we use as our pot box.

    The extreme left end of the unit has two open top boxes, one holds a 3kg gas bottle the other we use for vegetable storage

    One drawer is setup for our cutlery while another we have found will hold eight screw top containers.

    The containers are commonly available from the supermarket filled with breakfast fruits.


nuts & bolts
 

Slide Mechanism


    Two rolled steel channels run the length of the trailer, they have flat bar welded between them to maintain the correct separation and short angles welded to the outside which are used for bolting through the trailer floor to the frame cross members. The open sides of the channels face inward.

    The outside of the channel is about 45 X 30mm.

    Fixed to the bottom of the cabinet are two angle irons which again have flat bar welded between to maintain the correct separation.

    The spacing is such that these angles fit comfortably between the channels on the floor.

    Bolted to the outside of the angles are a number of (seven on each) Ball bearings on which the assembly moves.

    The Ball bearing assembly is 40mm dia outside 12mm wide and sealed on both sides, the OD should be about 1 - 2mm less than the inside of the channel. When fitting the bearings to the angle ensure there is sufficient gap between the top of the bearing for the top edge of the channel.

    Getting it all together the bearing rolls inside the channel


Locking Mechanism

    This is one of my mods. I was concerned that there was no reliable method of locking the kitchen assembly in place. Then after searching a few stores without finding something to suit (me) I built my own.

    The whole thing comprises two home made latches, operating handle (not pictured), and the connecting linkage.

    The two latches are mounted on the inside of the angle iron as close as practical to the inside end of the kitchen assembly. By placing this here I am able to lock it in any of several positions along the channel.

    The operating handle is just a simple leaver pivoted at one end and the linkage connected about 50mm from the pivot point.

    The link is simply a piece of fencing wire run through a 9mm copper tube for protection. As I needed to change direction I used two wire links connecting to two levers, when I pull the operating handle the two levers move towards the centre. These levers are then connected each by two (for flexibility) links to the latch assemblies.

    The frame for the latch is a fabricated box section about 75 X 35 mm. It is drilled to pass a 9mm rod through it. There is also two holes in the rod one at the end for the connecting linkage and a smaller one at an appropriate distance (about 50mm) from the other end into which I use a small split pin.

    Ultimately the rod passes through the angle iron and a locating hole in the channel. I have several holes in the channel to enable me to lock in several positions.

    The pictures of the latches were taken with the kitchen out beyond the end of the channel
 

    Care is needed in positioning the holes so that both latches will lock at the same time. I refrained from the final assembly of the latch until all holes were drilled and checked.

    Unfortunately you can not see in the picture but at the RH end of the compression spring is a washer and then between the washer and the inside of the box section latch frame there is a split pin through the 9mm rod.


Removable Legs

    I found the original fixed length, folding center leg to be a bit unstable and quite difficult to manage single handed so my first mod was to fit a pair of adjustable, removable legs. For extra stability they spread outwards at the bottom.

    With limited access the kitchen can be used at the mid way position without fitting the legs.


The Stove Lid

    On our first major trip we had a lot of wild windy weather which resulted in the original stays breaking. I got and fitted replacements but within a couple of days they too were history. The best I could get parts for was the arrangement shown on the tech pages. This lasted that trip and a few more, but has now been replaced.

    The latest version serves also as a wind break and is simple to use.
Once released from the lid the piano hinge at the bottom allows the stiffend sheet metal to fold down on top of the stove.


The specially shaped hole in the fold of the sheet metal slides over the head of a screw in the lid and the locking plate swings around to lock it in place.   


Final Words


    I would suggest if you are considering a similar project that consideration be given to using aluminium for as much of the cabinet as possible. I would expect it to be much lighter than the particle board.

    I know if I were to do it again I would.

    Enjoy.


 thanks to Ian Wilkin for sharing his thoughts with us


october 07