|
12volt
inline
WATER PUMP
installation

I always say half the fun is working out a solution to a
problem on the camper trailer, the other half is using that solution
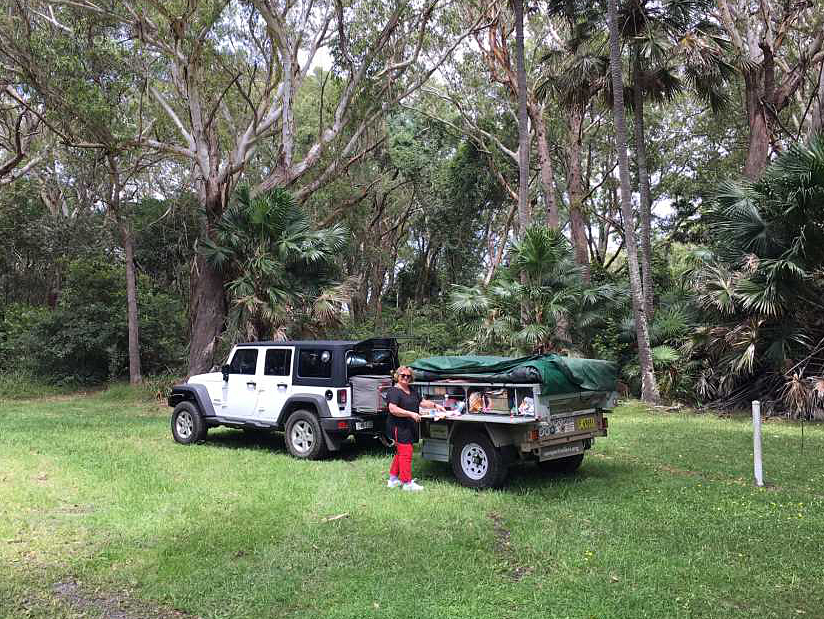
when camping. We have owned our Track Trailer Eagle for
thirty years, but still find a modification that makes camping a
little easier.
Carol & I had thought for some time it would be a
good idea to have a water outlet at the kitchen with a flick of a
switch instead of the hand pump which had limited up & down pumping
movement confined in the kitchen locker. For this reason the pump had
always been used as a spare, preferring to use the hand pump on the outside of the camper trailer. The hand
pump requires twenty pumps to fill the kettle with water to have a
cuppa in our large enamel camping mugs so it is a water saver.
|
 |
|
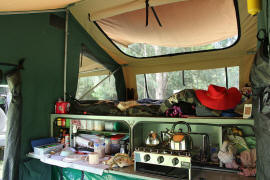
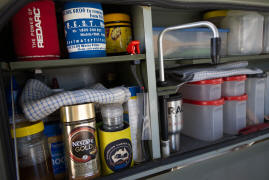
kitchen water hand
pump has limited up & down pumping action |
This project was to set up a 12volt water pump for drinking water from the
camper trailers 60 litre water tank to the kitchen. All water that goes into the water tank is
filtered with a BEST Water Filter so we know the water is in the
best possible condition for drinking.
which
pump & where
12volt pressure water pumps manufacturers recommend this style of
pump must be positioned in a dry location as the motor is not waterproof. Anywhere under the camper trailer was therefore out of
the question, especially more so as we have traversed the odd deep
water crossing.
I had mounted a
10 litre per minute 12volt Flojet pressure pump
behind the wing of the jerry rack six years ago. It has kept dry
& we have had no issues. This pump is used for
transfering water from the jerrys via a BEST Water Filter to our 60
litre water tank & also for showering. If I mounted a pressure pump on
the opposite side of the rack then the
hose would need to travel from the rear to the front of the
trailer & halfway
back again. Not a good solution.
One thought was a 12volt inline water pump, but this had to be
mounted at the water tank outlet height as this style of pump does
not draw a head, ie it does not lift water like a pressure pump. On
a positive note, being a submersible/inline pump it was fully
waterproof so could be mounted on the side of the water tank.
However in this position it would be exposed to flying rocks on dirt roads,
but it would
just fit within the protection of the steel stone shield & could be
covered with rubber to help protect it. So it was an inline pump.
 |
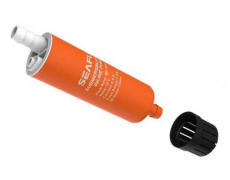 |
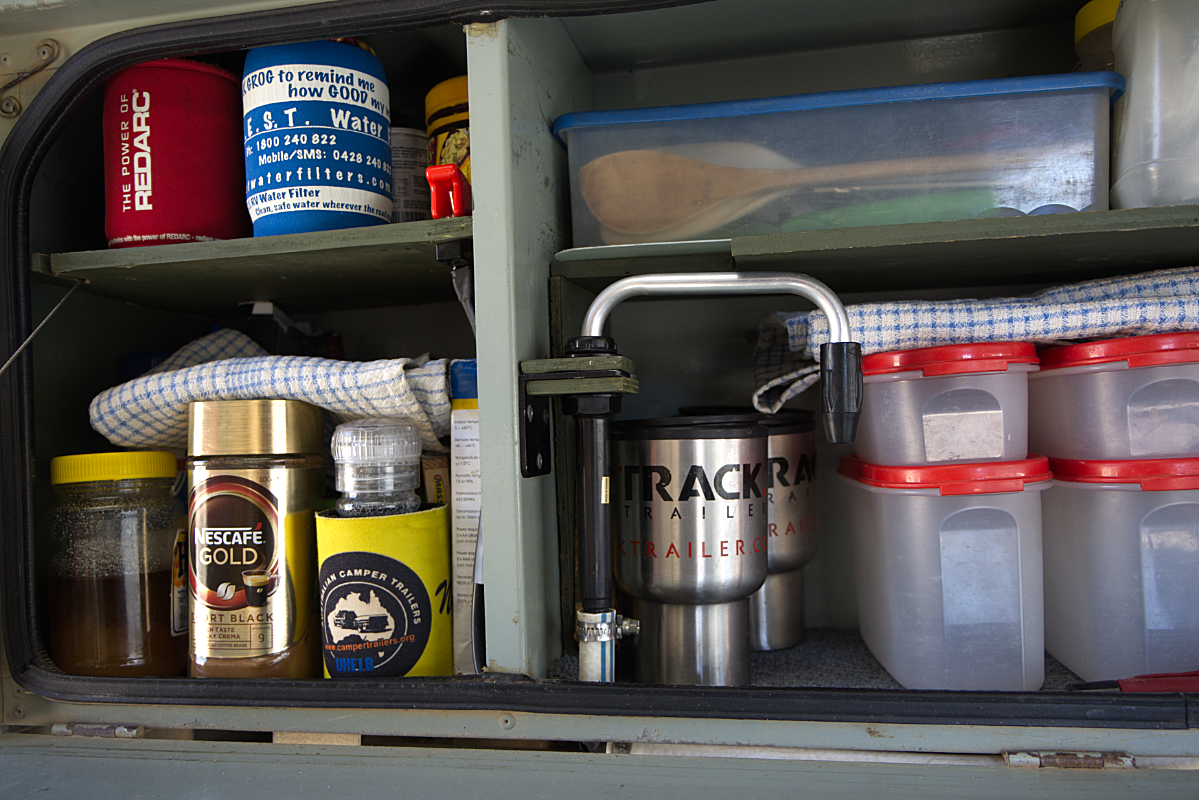
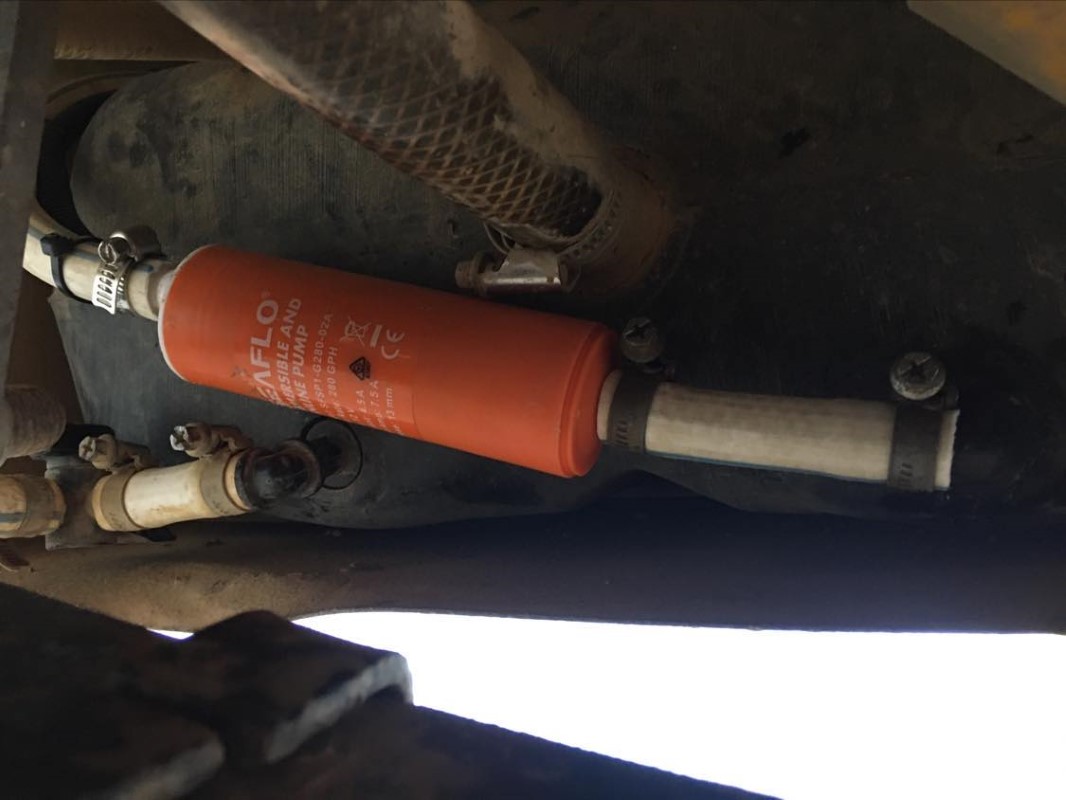
| SeaFlo
submersible 12volt water pump |
filter
cover removed |
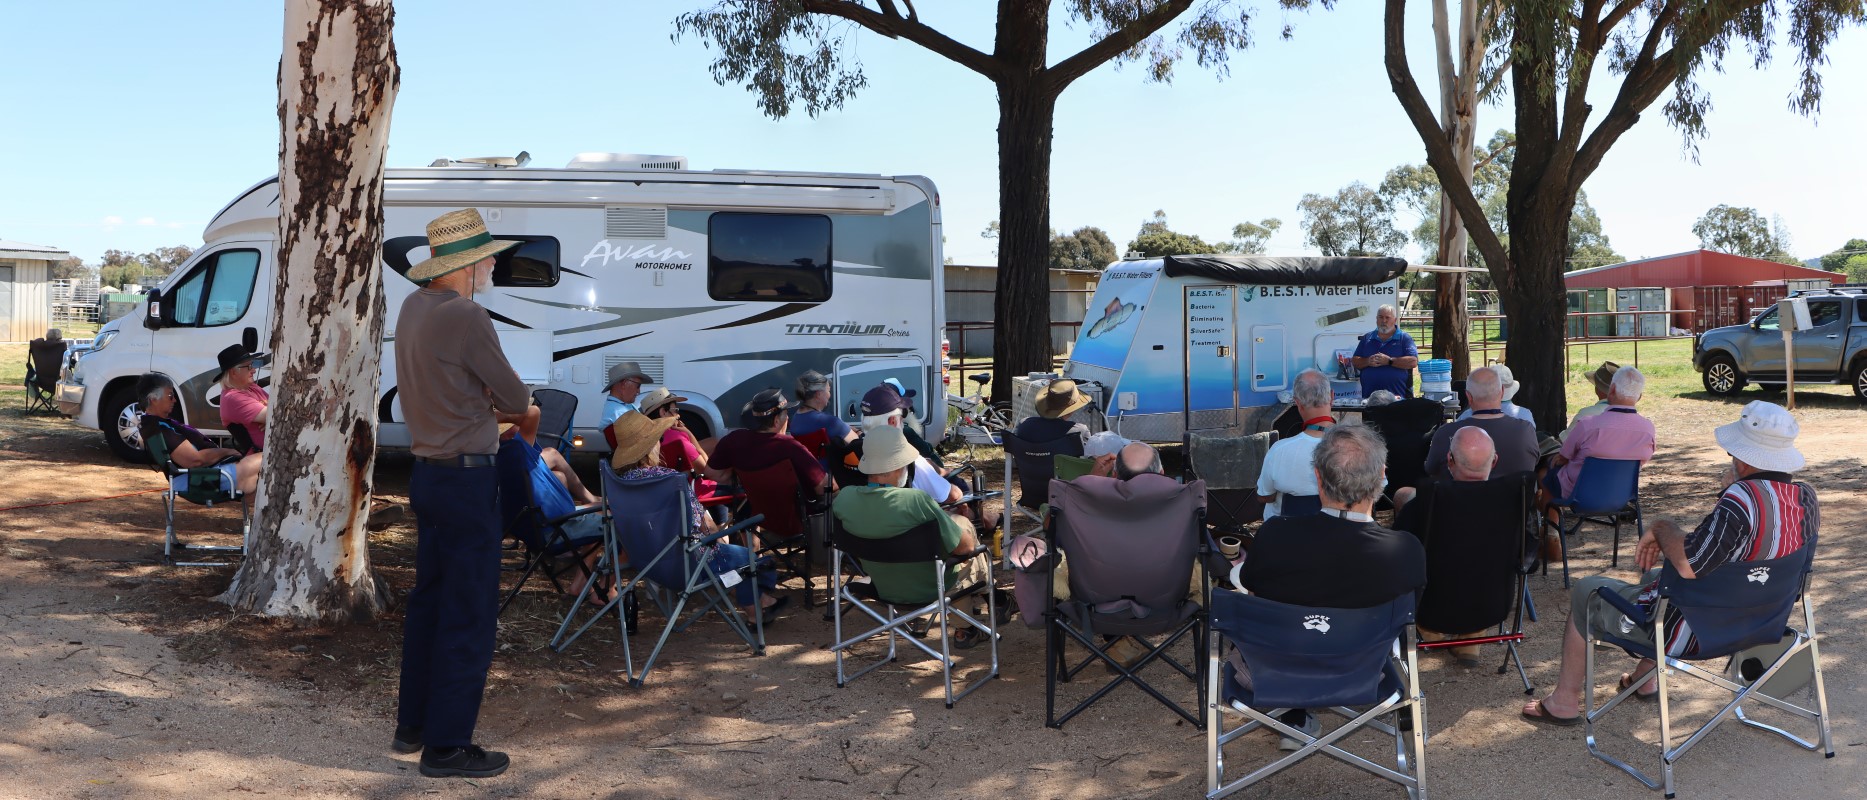
Colin Hopgood from BEST Water Filters presented a talk
on how to get
the best quality drinking water when travelling during the Australian CamperTrailers Groups 17th national meet
at Eugowra & had quality SeaFlo
12volt submersible/inline pumps on sale. The pump simply converts
from submersible to inline by removing the filter cover on the inlet
end allowing a 13mm hose to connect. The pump flow is 18 litres per
minute (280 gallons per hour) with a power draw of 4.5 amps.
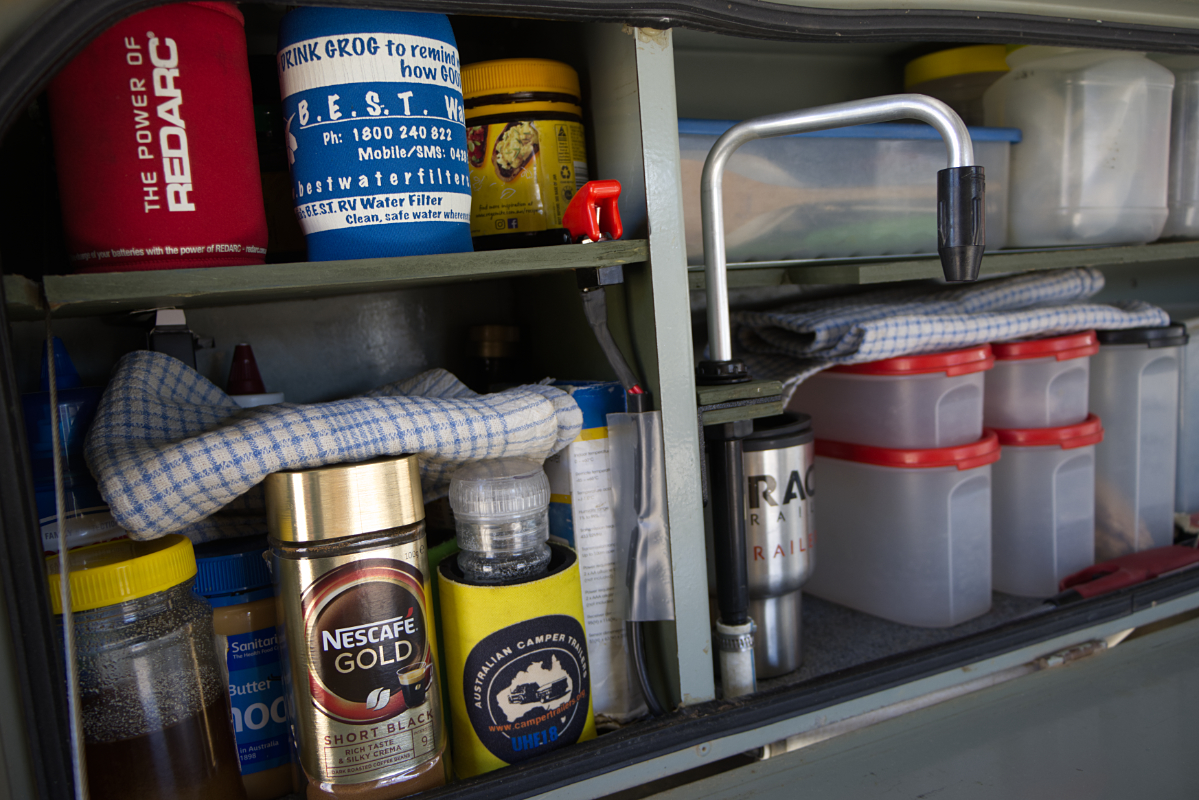
install
The food grade 13mm water hose was already in place from
the tank to the camper trailer kitchen locker. I
removed the straight thread to barbed 13mm water outlet fitting &
replaced it with a 90 degree 13mm thread to barbed connector to keep
the water pump against the tanks side. Placing tape around the
plastic thread of the fitting can flatten the thread preventing
future use of the tanks outlet. It is a better idea to put a little
neutral cure silicone sealant on the last couple of threads as it is
wound into the water tank to make sure it is fully sealed.
I ran the 12volt cable in some plastic conduit & cable tied it to
the hose as it went over the top of the water tank & along the
bottom of the trailer. The hose went to a
telescopic swivelling galley faucet
I found at Whitworths Marine & Leisure. This fitted
perfectly into the position where the hand pump was.
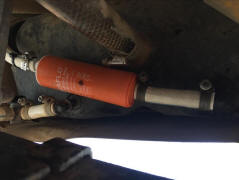 |
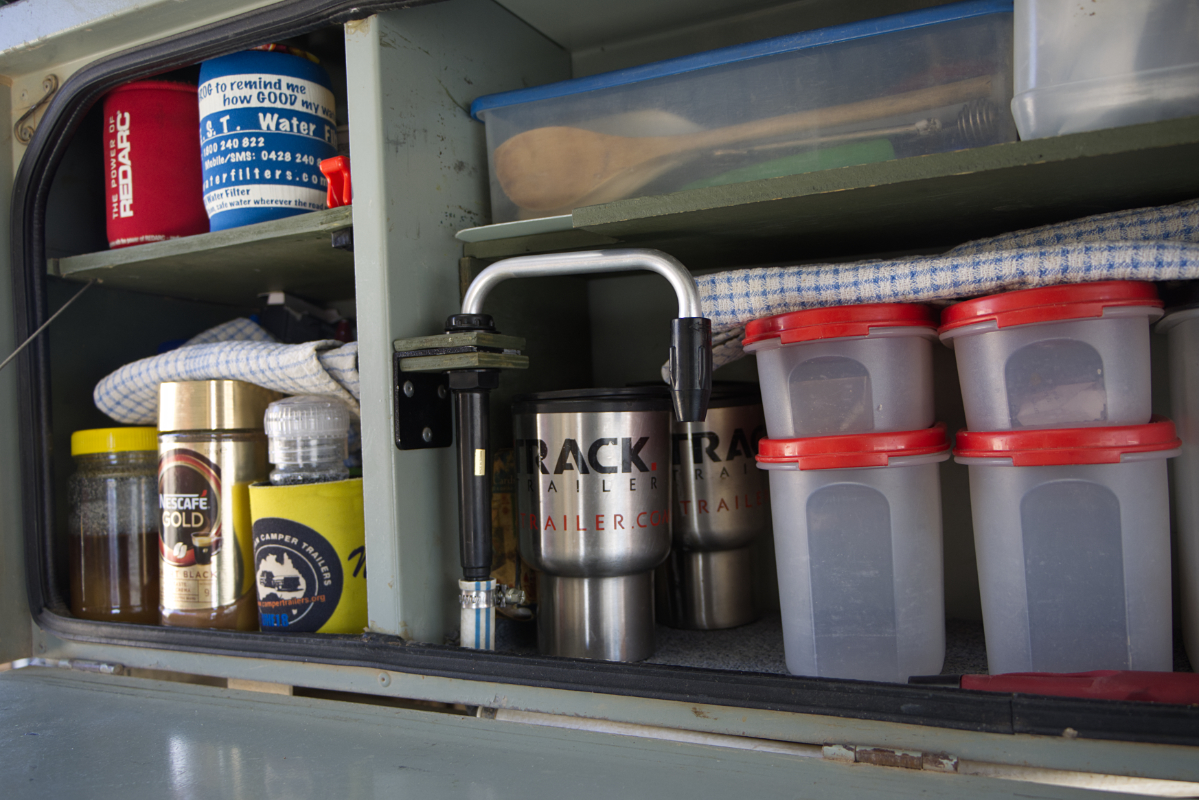
| water pump on side
of water tank |
The positive of the cable from the pump went to an on/off switch with a rocket
launcher cover next to the faucet. The cover made sure the switch
could not be accidently turned on when travelling. The positive then
continued on to the fuse box.
checking
it out
The faucet swivels back inside the locker
for travel. It can swing out & also extend to the height of what needs to
be filled. Our small kettle slips under the spout without lifting it
up.
 |
 |
| faucet
in for travel |
out &
extended - red switch cover |
This was a fairly easy job with a bit of laying on the ground under
the camper trailer. While I was at it I rewired the six blade fusebox to
allow the water pump to have its own fuse, removing two of the four
cigarette sockets. I
also installed two Anderson connectors at the rear of the trailer that I
had been promising myself. We have found the Kickass
outlet box with USB's & on/off cigarette sockets to be very handy at the back of the trailer under the awning
when set up.
Only the Anderson connectors are on the outside of the trailer
exposed to the elements.
tools
For the 12volt side of the install I have an insulated terminal crimper as
well as a crimper to suit the Anderson connector uninsulated terminals,
plus a collection of different size insulated terminals on hand. I
also have a soldering iron & shrink insulation.
It is best to use food grade quality hose to avoid a plastic taint. Clear hose can kink easily & also
allows bacterial slime to grow if there is water in the hose exposed
to light.
costing
The food grade 13mm hose
was already in place, I also had the four hose clamps, 12volt cable
conduit & the on/off switch, so there was not much overall cost involved
installing the water pump & outlet. I had to buy
article by
Rob
november 2023
|


