|
diy camper for
under $6,000
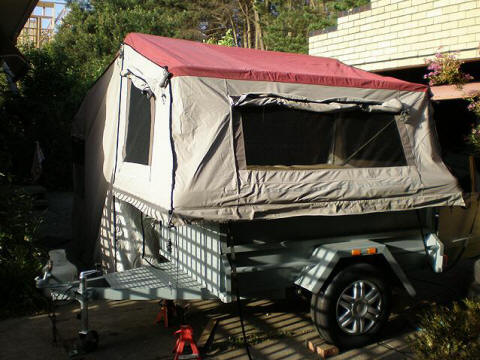
I purchased an Xtrail camper trailer top on Ebay sight unseen
for $1,400 from WebSam Solutions. The owner Sam was very helpful. I
have been to his premises a couple of times and found both he and
his staff are very accommodating.
The Xtrail
camper trailer top included
-
a travel cover to go over the top
-
a cover to accommodate an inner
spring mattress
-
lockable latches for the side
of the trailer
-
two gas struts to support when lifting the
camper top and allow access to the trailer.
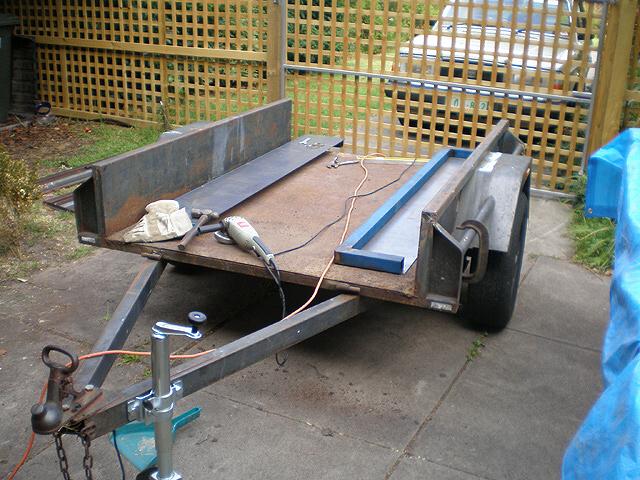
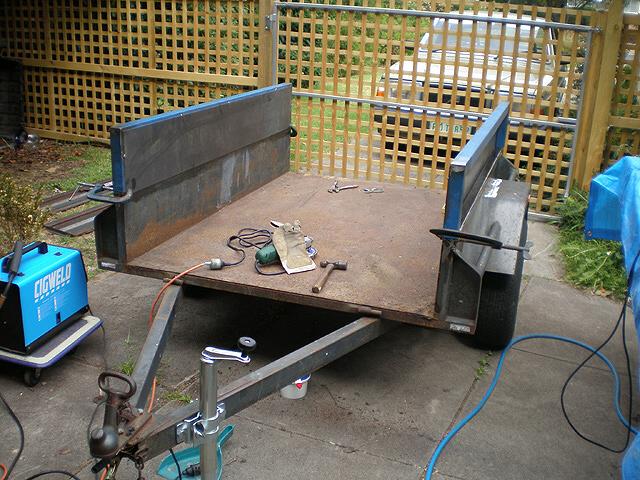
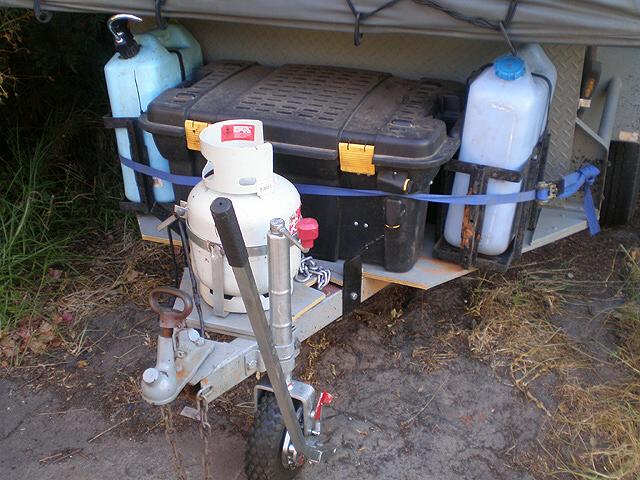
I fitted the camper top to my 6 x 4 heavy duty trailer by
raising the height of the the sides and fitting a swing tailgate.
The steel for this modification cost $85.
I then built a Drifta inspired slide out kitchen for $50,
added four jerry can holders, two on the rear and two on the drawbar for
under $100. Also on the drawbar is a battery box from Bunnings for
$28.00, containing a 130 amp hour battery, 3 stage charger and solar
regulator. There is also a mount for a 4.5 kg gas bottle on the
drawbar, homemade for around $10 along with a set of 70-120 kg load
levellers at $110.
For what I have paid for the overall unit I am more than happy with
the quality. While it is not as heavy duty as some of the more
expensive units, it is still comparable with many mid range units I
have seen.
I bought it as an entry level camper trailer to find out if the family
liked camping and to learn what we could improve or look for in a
more expensive unit. As it has turned out, we will not need to
upgrade for some time as everyone is happy with what we have.
The areas we have improved the standard camper trailer are as follows:
◊
We changed the King size 100mm high
density foam to a Queen size memory foam mattress for $200. This allows
for additional storage space beside and at the end of the mattress.
◊
Added the larger cover to
accommodate the new mattress. This still allows plenty of storage
space for tables, chairs, our daughters mattress, carpet, solar
panels, ladder etc.
◊
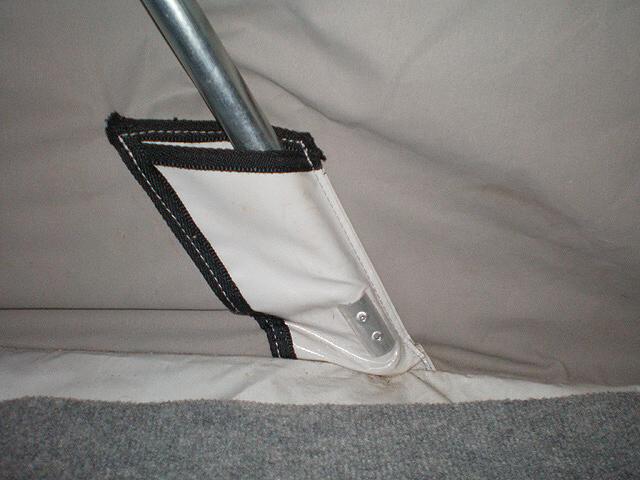
Fastened the ends of the
retractable poles in the main tent (in the soft floor area) into
their holders with large pop rivets. This made it much easier to set
up and pack up. One person can now do it if necessary.
◊
Added a spreader between the roof
supports in the main tent.
◊
Heavier duty guy ropes and pegs for
the annexe and tent end.
◊
Added the optional silver tarp that
goes over the top of the whole unit when erected. Keeps it cool and
eliminates the potential for leaks in heavy rain.
◊
We also put shade cloth under the
soft floor to protect it, however this is probably wise with any
soft floor. We also invested in some waterproof carpet for the tent
area. It's much easier to keep clean and warm. Just hose it off when
you get home.
◊
The awning on this style of camper
trailer is permanently attached. On a recent trip I found for
overnight stops you can just peg it out with a couple of poles.
Although once you work out the tricks to putting it up it takes less
than 10 minutes which is probably a better option should you get a
big wind.
◊
Alternatively, I have since devised
a way of keeping the awning folded across the main tent area by
running “shock cord” through the eyelets on the outer edge of the
awning and fastening this to the back side (facing the drawbar) of
the tent.
◊
The sides to the awning are
difficult to attach for one person. The sides attach with velcro
and once you work out how to align them they work well. I find it
saves a lot of weight if you leave them behind. Just build a bigger
fire to keep warm.
|
Basic camper trailer set up |
$1923 |
|
Rego & insurance |
$ 180 |
|
we have added the
following items of our choice |
|
|
Coleman water heater,
carry bag, spare cylinders, mains hose and gas fittings
|
$ 500 |
|
Coleman shower tent: |
$ 150 |
|
Coleman 3 burner gas
stove, gas bottle plus grill plate and oven |
$ 380 |
|
Porta Potti
|
$ 65 |
|
Coleman fold up table
and stools |
$ 120 |
|
Two Coleman chairs
|
$ 100 |
|
Visitors stools
|
$ 20 |
|
3way Waeco fridge and
gas bottle |
$ 500 |
|
130 amp hour battery,
charger, regulator, 40watt solar panel and 3 LED lights
|
$1500 |
|
Four jerry cans and two hand
pumps |
$ 200 |
|
total |
around $5638 |
Where possible
we buy most items at sales, such as Rays 25% off everything sale
etc. For example the Coleman chairs which retail for around $100.00
each were purchased for $50.00 each.
thanks to Dave
Pederick for sharing this idea
february 2009
|