|
diy hot bush
shower

introduction
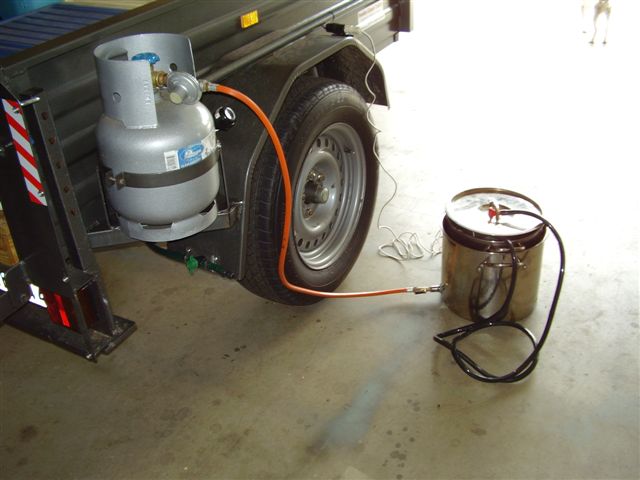
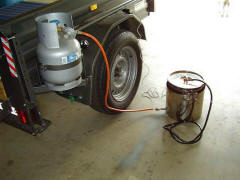
Here’s a hot shower I made a few years ago. I
used to have a Primus but I found it took too long to assemble and
the operation of the unit was pathetic. With this unit all you have
to do is connect the bottle to the burner, light it up and put water
in the top bucket. 3-4 minutes later you have hot water, and then
just place a shower pump in the water
introduction
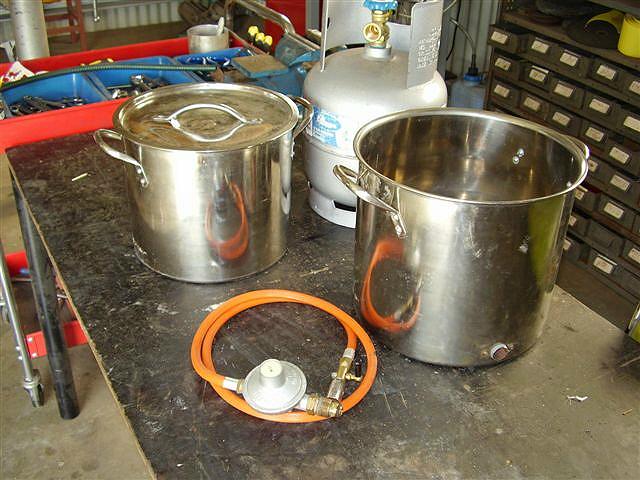
-
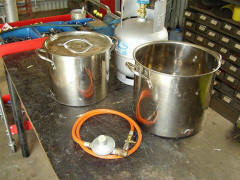
$30
shower pump from a camping store - remove shower rose and attach
rose from solar shower - doesn’t use as much water.
-
15
litre S/S bucket with lid - $8 from the $2 shop.
-
20
litre S/S container - $10 from the $2 shop.
-
regulator and hose.
-
fittings as shown.
-
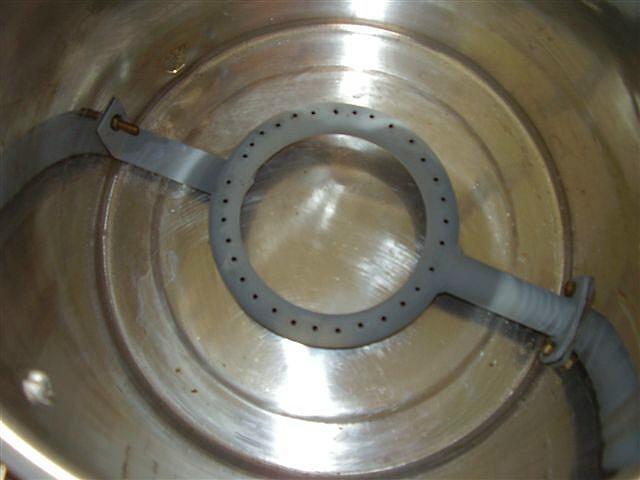
heater
ring.
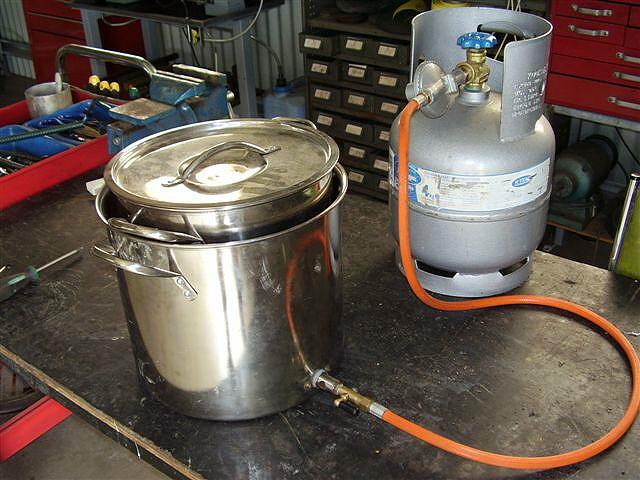
putting it
together
The heater ring is made from
a piece of 22mm tube bent around a 6inch jig, then cut and weld ends
together. Drill a number of 3mm holes around the circle. Weld
another piece of same size tube to one side and drill a 19mm hole
through tube and into ring. Add a couple of 3mm brackets (one on end
of heater ring inlet tube, the other directly opposite) and mount
inside the 20 litre container, about 20mm from the bottom.
The 15 litre water container goes inside that (the handles
stop it from sitting on the heater ring. The fitting is easily made
and tap is optional; however, regulator at one end and a jet at the
other are critical. The fitting is a piece of 19mm tube (sliding fit
inside heater ring inlet tube), with a threaded nut to fit the hose
welded in one end and 2 holes, around 10mm, drilled across tube to
allow gas and air to mix. This is then screwed on the end of the
hose and is a sliding fit inside the heater ring inlet pipe.
operation
In operation it takes around 30 seconds to assemble, 3-4
minutes to heat (long enough for a stubby), will operate in any
weather (strong wind and rain) without extinguishing and will not
set the surrounding bush alight. Shower hose fits inside top tub for
storage. You can even use it for cooking your crabs.
|
|
 |
 |
|
ready to go |
components |
assembled |
|

|
 |
 |
|
heater ring |
fittings |
fittings assembled |
thanks to Tony for sharing this idea
january 2009
|