|
electrical
upgrade
goldstream wing 3
We recently purchased a new Goldstream Offroad Wing 3 camper. As it
was off the showroom floor we could not specify exactly what we
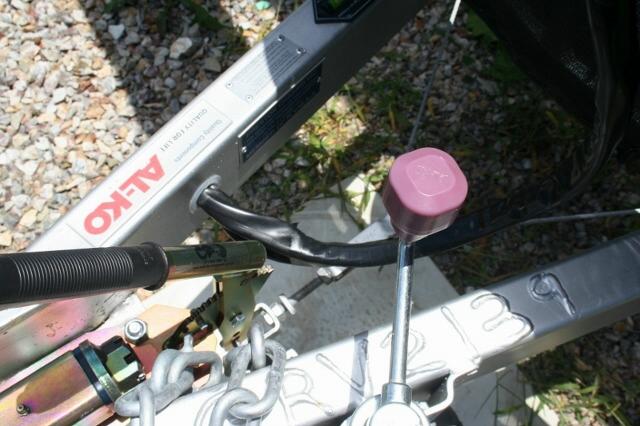
wanted but did have the standard ball coupling replaced with a
vehicle Components Hitchmaster D035 coupling. While the basic camper
itself is fine from the point of view of chassis, suspension etc.
the 12volt electrics are basic in that it is intended to run the
12volt lights only and are something that needed some serious
upgrading. I have not touched the 240volt side of things and see no
need to do anything there as we would not normally use 240volt and
if we had to it would only be used to charge the camper batteries
with the inbuilt Ctek charger as everything we have, except the
microwave, is 12volt.
The Dometic 90 litre 3way fridge is not
connected to the house battery for 12volt operation as at a constant
15 amps it would drain the battery in no time at all. Instead it is
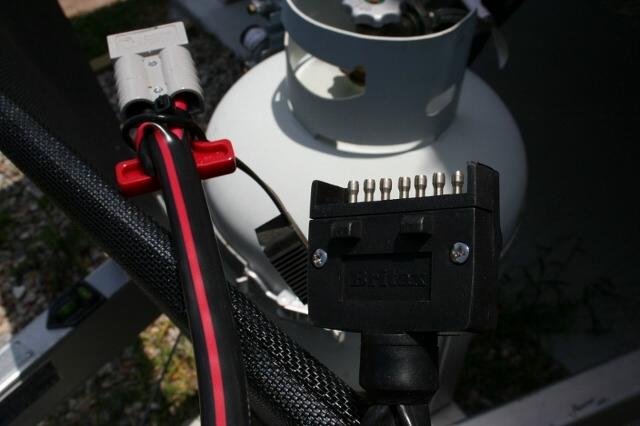
wired up to use pin two of the 7 pin trailer plug (Reverse/Aux).
There is just no way that the car’s, nor the trailer wiring harness
could provide that sort of current through that plug without a
serious voltage drop. I had visions of a melted plug or even a fire.
The camper came standard with an Anderson plug (non-genuine) with
6sqmm cable wired back to the camper battery for the purpose of
charging the battery while on the move. While this may be basically
adequate I decided that since 6B&S was used to the rear Anderson
plug in the Prado I would also replace the 6sqmm cable with 6B&S.
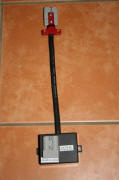
Feeding the twin 6B&S cable through the drawbar proved a challenge.


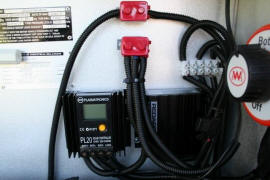
As the Prado D4D has a problem charging
auxiliary batteries due to its 13.2volt ouput from the alternator
(Euro standard) I have a Redarc BCDC1220 under the bonnet to charge
the auxiliary battery in the Prado but decided to get a second
BCDC1220 for the camper so that the battery there would have a
decent chance of being charged correctly.

wiring in/out of
the front boot
The 6B&S cable from the Anderson plug feeds
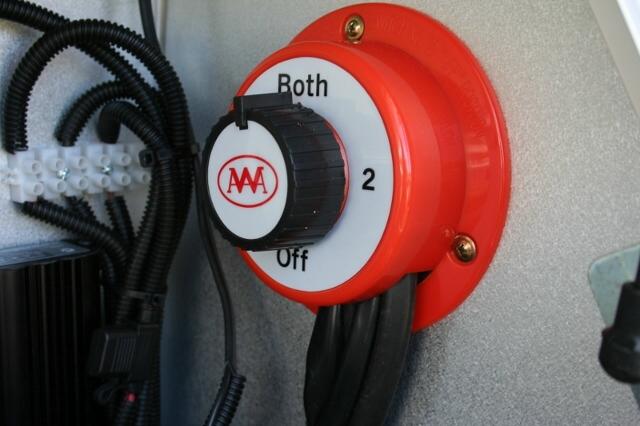
this via a 30Amp fuse. This is fed directly from the main car
battery, via a 60Amp fuse and battery isolator, rather than from the
auxiliary battery which would normally be used by most. From this
6B&S cable I also ran a line directly to the fridge 12volt
connection, bypassing the existing cabling, so the fridge would have
a decent 12volt source when on the move. There are four circuit
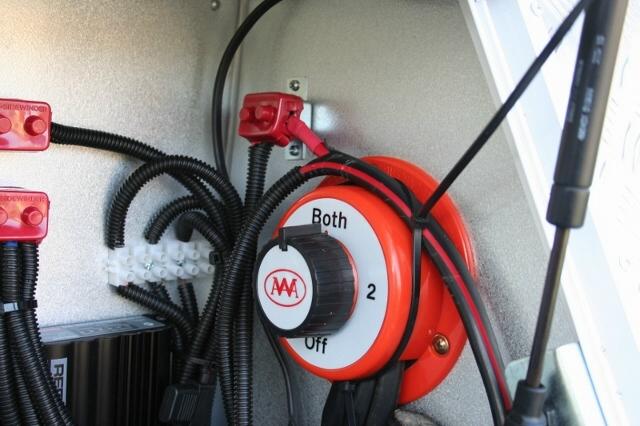
breakers, 20Amp on solar input line, 50Amp on line from car, 50Amp
on line to the fuse panel and 50Amp to the Auxilary in/out line.
I have also installed a short 6B&S cable via a 50Aamp circuit
breaker (auxilary line) from the battery to an Anderson plug so that
I can plug in a second battery, eg. car aux, or charge the battery
from another source.
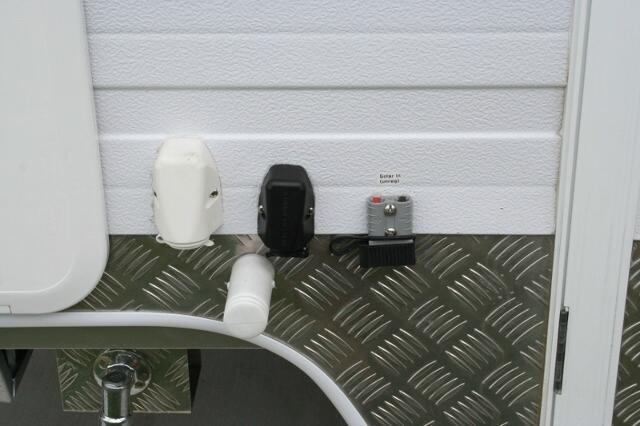
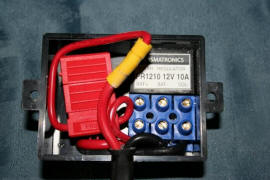
As we have a 125Watt solar panel I installed
our trusty Plasmatronics PL20 solar regular next to the Redarc. This
is fed from an Anderson plug on the side of the camper. As our solar
panel does not have a regulator built into it (I prefer the
regulator close to the battery so there is little voltage drop) I
have made up a portable 10Amp regulator that can be used if I want
to charge to car Auxilary from the panel or the camper battery if
the PL20 were to fail.
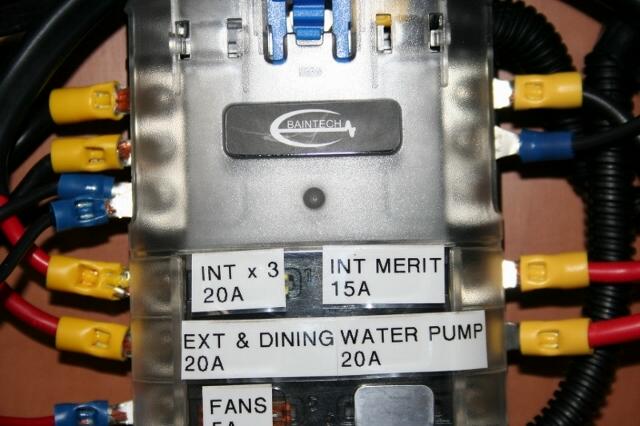
all battery load goes
through the PL20 and feeds back to a new fuse panel in the camper
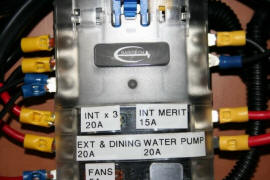
fuse panel with inbuilt
negative bus
The fuse panel feeds the eight 12volt outlets
that I have installed (five marine cigarette sockets and two merit
style). The merit sockets, one inside and one outside, are for the
Waeco drinks fridge if removed from the car. All cabling is 4sqmm
for short runs and 6sqmm for longer runs. This should keep the kids
and their endless electronic devices they need to charge, happy. I
also replaced the pathetic cabling to the water pump with 6sqmm
cable and also included an on/off switch to stop it ‘cycling’ at
night. Much improved now.

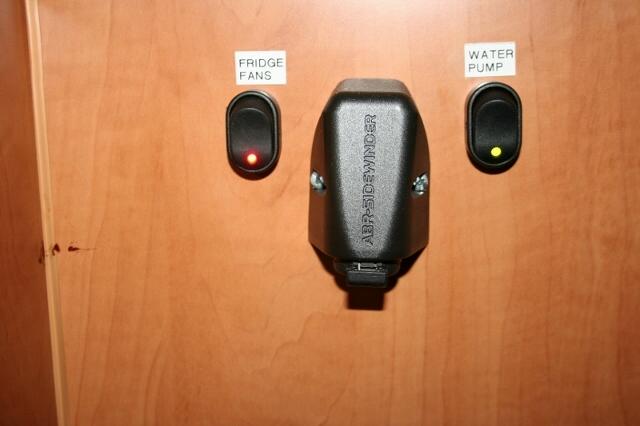
fridge fan switch,
internal merit socket and water pump switch
The whole wiring job was done keeping in mind
any possible upgrades in the future. Total cost is hard to estimate
as I already had many of the items. The cabling was expensive as
6B&S cable is quite pricy given the amount of copper as well as the
6sqmm and 4sqmm cable used. I estimate I spent around $1100 for
PL20, Redarc BCDC1220, cable, fuse panel, breakers, terminals,
Anderson plugs, 12volt sockets etc. Plus untold hours of my time.
All Anderson plugs used are genuine as I found out the hard way that
cheaper versions can and do fail. Main suppliers of parts were
Dynamic Solar Solutions and Springers in Qld.
Thanks to Kevin Beckwith for this article
january
2012
|