|
diy
jockey
wheel inspection
Because of their placement placement, jockey wheels are subject to a
great deal of dust and road grime. Foreign particles find their way
into the mechanisms of the jockey wheel and in particular cause
corrosion and pitting of the ball race and its cup washers –
components that take the load when you wind up the front of the
camper trailer. This wear results in a grinding, rough feel as you
turn the handle. Also the jockey wheel may not turn as easily
therefore moving by hand will be difficult to manoeuvrer it.
By replacing the worn or pitted ball race and the
jockey wheel bearings, the trailer can be made to feel like new
again. You might also consider a way to keep moisture out of the
mechanism if the device is left outdoors for prolonged periods.
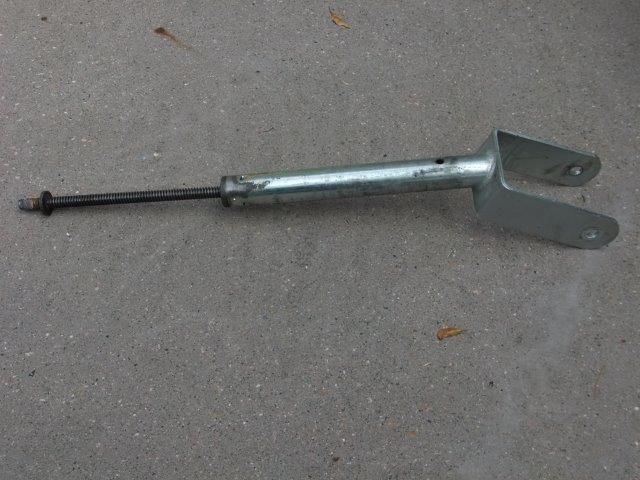
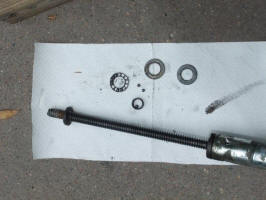
To start with, the main part of the jockey wheel
consists of three parts
1. Outer tube
2. Inner tube and yoke
3. Winding thread (Acme Thread) and pressed nut (Acme Nut)
step by step
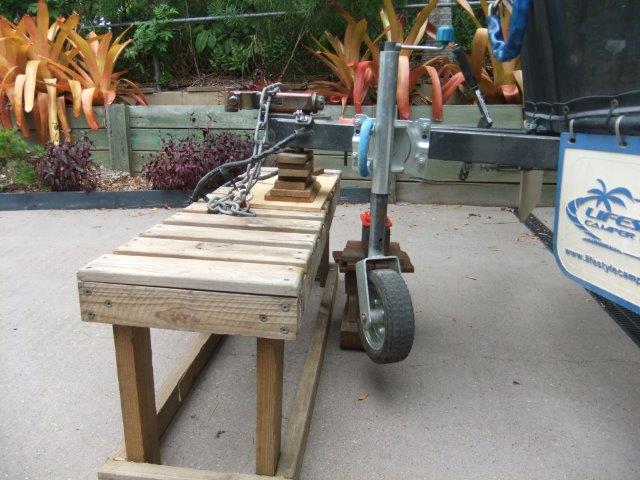
01 I had to raise the front of the camper
trailer on a bench (previously used for potted plants). I did try to
leave it attached to the car and just remove part of the jockey
wheel, but found it would be easier to take it completely off the
drawbar.
Note: At this stage it may have been better to remove the whole
jockey wheel from the trailer and place it in a vice. However, I
chose to just remove part of unit and leave the bracket and main
tube attached to the trailer.

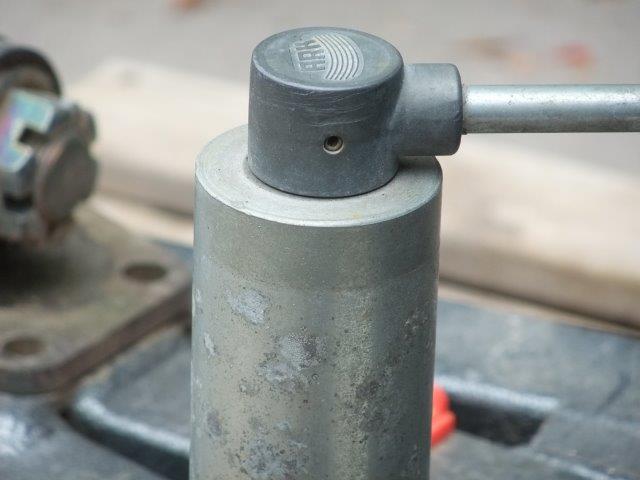
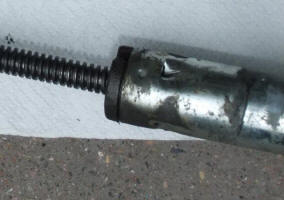
02 To inspect the bearings and Acme Thread
I had to remove the winding handle. This is done by using a parallel
punch to knock out the “Dowell Spring Pin”. The pin is seen in the
photo below in the centre of the winding handle head, the handle
needs to be free of the unit to begin the service.

03 I don’t own a parallel punch, so I
ground back a thick nail removing the point and smoothing it off to
have a flat end (burnish the burrs from the edges) to tap out the
dowel spring pin. The punch must be a near fit for the hole in the
handle.
I also had to make a larger punch to remove the axle from the wheel
housing described later) but below are the two tools for the job.
04 Once an end of the dowel spring pin is
protruding, it may be possible to grasp it with pliers to extract
it. Keep a record of the roll pin size as you will need to put a new
pin in the hole – don’t re-use the old one as it may be a ‘looser’
fit whereby it may dislodge causing your handle to fall off.
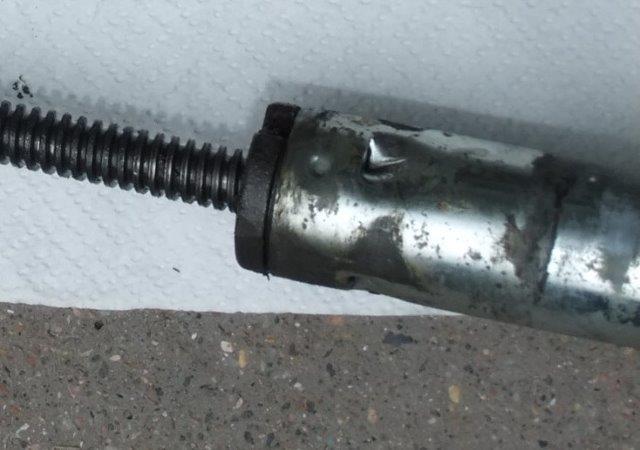
05 Now the jockey wheel’s inner tube can
be removed from the outer tube.
WARNING – if you do
not take off carefully, the balls from the bearing may dislodge all
over the ground therefore requiring you to purchase a new bearing.
In most cases you may need new bearings.
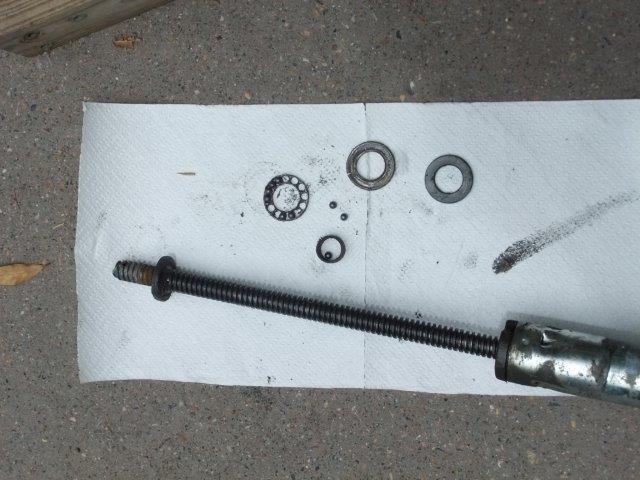
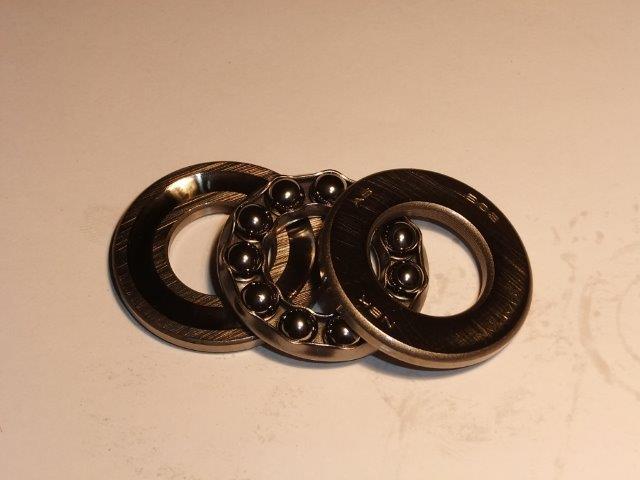
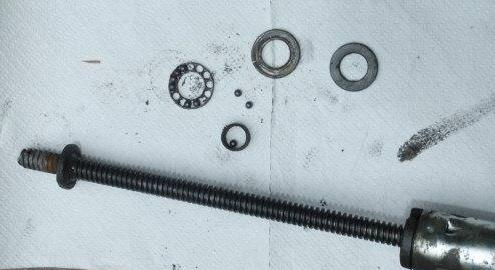
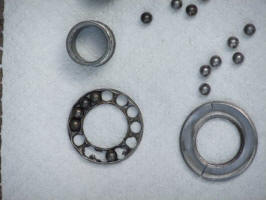
06 At the top of the core assembly and
sitting above the acme nut are a series of washers and bearings
called the ‘Thrust Bearing’. It is made up of a bearing ring
containing balls which is sandwiched between two ball race washers.
A nylon tube is placed in the centre of the three parts and helps to
centre it over the acme thread. The whole unit sits at the top of a
thick washer which is welded to the acme thread. Below is the
remains of the thrust bearing which, when taken out of the tube,
dislodged many bearings although I suspect some had previously
fallen out of the housing.
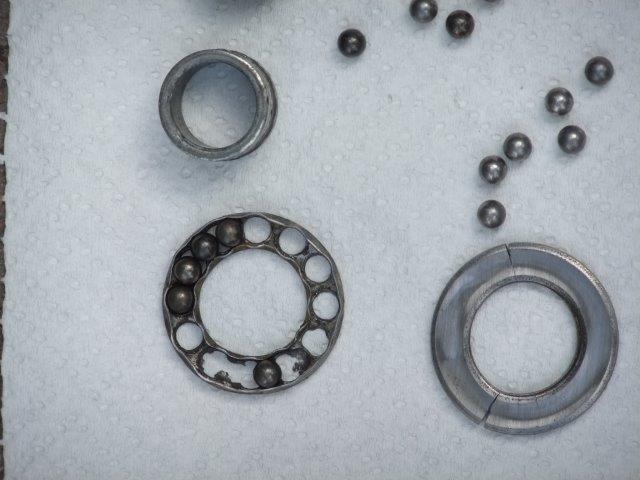
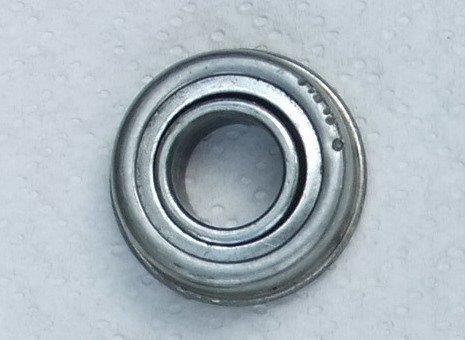
Below is a close up of the main ball washer and
the damaged race washer with a split in it. I could only locate 9 of
the 12 balls therefore I decided to track down a couple of new
bearings (one as a spare and one to install).
07 I sent an email to the manufacturers of
the jockey wheel ‘ARK’ to enquire about how to best service the unit
and take it apart. They responded stating “You will notice a small
indentation on the inner tube, this is where the nut is held in
place, you can pop the nut out with a hammer and screw driver and
pull it apart from the inner tube”.
Once your winding thread and pressed nut is
apart, you will need to clean the grease off and inspect for any
damage or burs that may stop the jockey wheel from winding. If all
is good completely grease the thread with a good quality marine
grade grease and replace back into the inner tube and reverse your
steps of assembly.
Below is a close up of the indentation on the
inner tube. I put the whole unit in a vice and tried to remove but
was not able too. I feared that if I hit with too much force that I
may damage the tube, nut or myself so quit while I was ahead.
08 I wound the acme thread out as much as
it would go (there is a ‘welded nut’ on the base to stop it winding
out fully which is good to know – stops the jockey wheel being fully
wound off the trailer). I cleaned the old grease and dirt off the
thread with a solvent (grease remover purchased from some auto
store). I then liberally applied a liberal amount of automotive
wheel bearing grease (Timken Hi Temp Premium is the product I
already had) then wound it back into the inner tube. At the base of
the inner tube is a 20mm hole to which I applied more grease to a
small piece of dowel and inserted it through the hole and tried to
grease the bottom end of the acme thread.
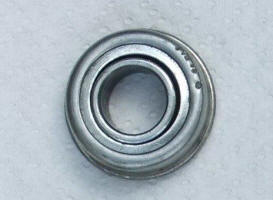
09 Obtain a new upper bearing set to
replace the worn and gritty or completely damaged set. Apply a
liberal amount of grease to the new bearing set and assemble it on
the shaft.

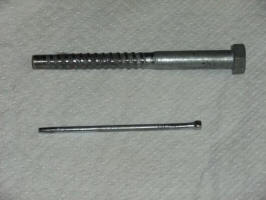
10 Next is to remove the two cotter pins
from the axle. You will need to use pliers to straighten then then
gently knock them out from the axle. Take off the washer and try to
push he whole axle through the yoke housing, through the wheel and
out the other side. I found that the one of the wheel bearings was
preventing the axle from being pushed through an had to knock it out
using the larger punch which I had made earlier (see photo in point
number 4.
Below is the better of the two bearings and it
was very loose but the internal core did remain in place on this
bearing. It was rusted and split on the other which I found is what
prevented the axle from coming out of the housing.
11 Now I had the complete yoke free so I
could inspect it for damage. I rubbed it with ‘00’ size steel wool
soaked in kerosene and polished it a bit and took off some of the
surface rust and weld splatter.
You will also see a hole which I drilled into the
inner tube a couple years ago – it matches a similar positioned hole
in the outer tube so when they are aligned in the upright position
(i.e. when camper trailer is being towed), this prevents the wheel
from moving and bashing against the ’A’ frame of the trailer. I
insert a 10mm cuphead bolt though the holes.

12 Follow the above steps in reverse to
reassemble the jockey wheel. The only part that I didn’t replace was
the bracket itself or the spring which is contained on the swivel
part. Note – this may not apply to people who have removable jockey
wheels that are inserted within a ‘clamp’ type system on their
drawbar.
13 To extend the life of the bearing if
the camper trailer is left outside in the weather, I found the
following two suggestions on the internet;
1. slot a can and place it over the jockey wheel to stop water
entry.
2. Cut a 150mm length of 40mm pvc pipe, buy a 40mm end , then cut
10mm wide slot length ways so it will fit over the handle. glue the
end on and no more water can get into the working area. hope this
helps.
parts list
I sourced
the following bearings from ‘Statewide Bearings’ in Brisbane and
suspect that the same parts numbers will be available at any bearing
store;
-
Thrust
Bearing NSK item No 51203 - $15.47 each
-
Wheel
bearing – no name branded on it but listed on invoice as K35110F
UNGROU item No J2210F – I was told that these bearings are the
ones to replace wheelbarrows and wheel-trolleys and are pretty
common. - $7.42 each.
-
Roll pin
is 5/32 diameter and 1 ½ inch long (sorry, inherited a set of
assorted roll pins and they are imperial sizing hence the ‘old’
measurements). Think that converts to 4.2 x 37mm according to my
callipers.
-
2 x 50mm
long cotter pins
-
Timken
Automotive wheel bearing grease – premium hi temp grease.
Note: ARK state they have spares available but I couldn’t see them
on their website. The email sent stated the following available;
-
Complete
swivel bracket
-
Winding
handle
-
Thrust
bearings
-
Wheel
bearings
Their email
address is
sales@arkcorporation.com
I also
sourced a company in Brisbane that do spares but they were closed
for the Xmas holiday break - All Trailer Spares – 605 Toohey Road
Salisbury 4107 (07 3277 2802)
http://www.alltrailerspares.com.au/catalogue%20search.aspx?categoryID=117&SubCategoryID=91
thanks to Matt Stone for this article
february 2013 |