|

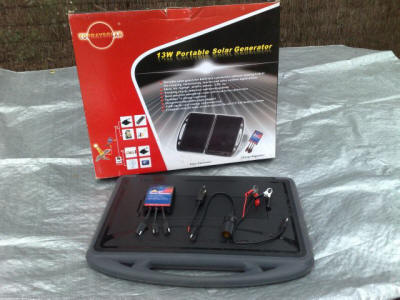
13W Portable Solar
Generator
affordable
solar for fridgeless campers
While we don’t use a fridge at camp, we do have a battery for
lighting, charging USB items and also on occasion to run the laptop
or a little TV. The battery is a large “wet” starting unit fitted
under the bed at the rear of the trailer. Because of the gases
produced when fast charging, I would normally take the battery out,
however it is reasonably heavy and awkward to remove/refit. A small
solar panel appeared to be a good way to keep the battery topped up
with much less risk of an explosion (the battery area is vented but
you never know).
With Easter fast approaching I was on the lookout for a
suitable panel when, as luck would have it, both K-Mart and Repco
advertised “briefcase” arrays on special. Both claim 13 watt output
but I favoured the Repco one as a separate charge regulator is
included. The K-Mart unit appears to be the same brand but a
different (older?) model, rebadged as Jackaroo. The array I
purchased is marketed as a “Portable Solar Generator”, TOPRAYSOLAR
model TPS936N. The Repco Easter catalogue price was $99.
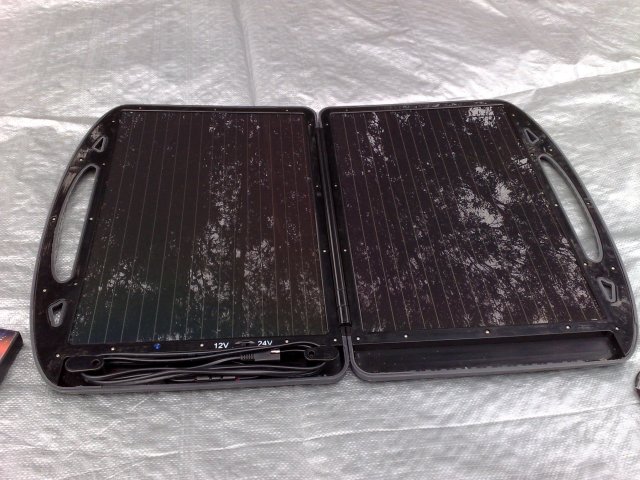
The unit uses two solar panels (each 295mm x 440mm) mounted
in plastic backed frames joined by a hinge. The outer edges of the
frames are covered in a rubberised material and the whole thing
feels quite solid when closed up, just as well as it is quite
weighty. Opening the unit requires pulling the “handles” apart with
the tips of your fingers – could be tricky for some as the magnetic
catches are quite strong. Inside you will find a three metre
attached lead with plug to suit the included regulator, a switch to
select between 12 or 24 volts output, and a pretty blue led which
may or may not be flashing – it seems to have a mind of its own.
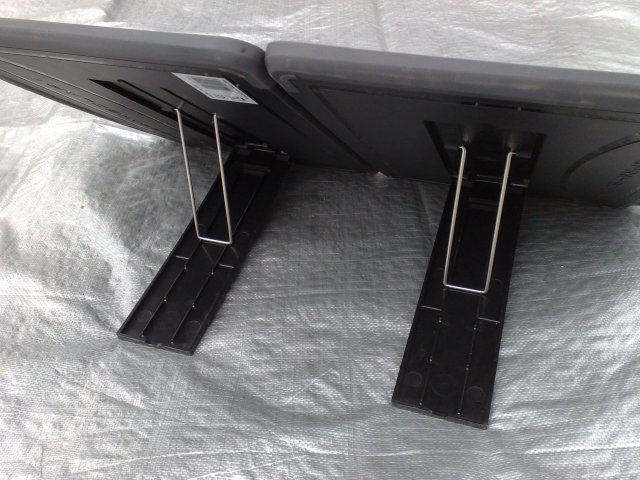
Hinging down
from the back are “feet” which, when locked into place by wire
supports, form a base so the unit can be angled toward the sun.
These feet actually flex quite a bit which seems to cheapen the
package a little – I guess the manufacturer could claim they act
like shock absorbers but I think that would be from fault rather
than design! The wire supports can be placed in different slots
depending on the angle of the sun, however down here in Southern
Australia you’ll run out of adjustment for at least part of the day.
Putting something under the rear of the feet will help here (the box
is about the right height). Another solution is to spin the whole
unit 180 degrees and use the feet as support legs.
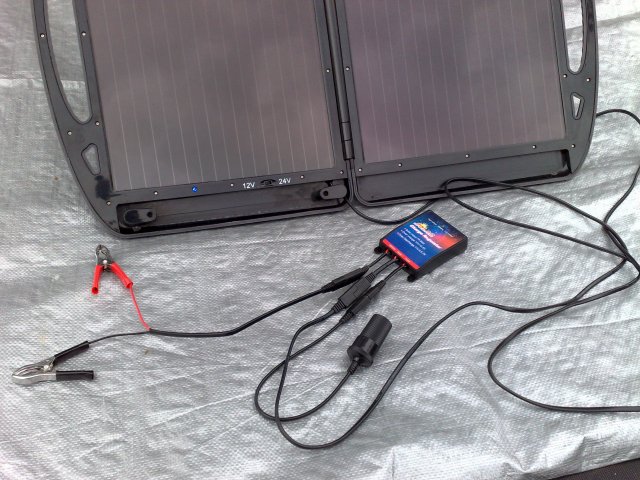
Apart from
the regulator, the package also includes a battery lead with colour
coded spring clips, and both male & female cigarette lighter
connection leads. These all use the same style plug at the regulator
end, and while the connections are marked on the regulator, they
could still plugged into the wrong input/output by accident. Some
rudimentary instructions are also included.
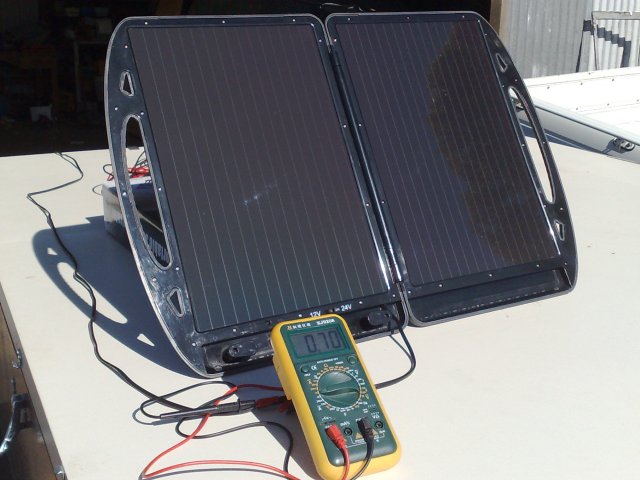
I was
under no illusion that the unit may not perform up to the quoted
specs, however, it is actually not too bad. Advertised output: 13W/
17.5V/ 740mA. Easter Friday at camp was warm and sunny, ambient
temperature about 25c. Unloaded the array was producing almost 25
volts, when connected to the battery this went down to a working
voltage of 12.35 volts, charging at 0.74A (3/4 of an amp). Blocking
the sunlight from one panel dropped the rate to about 0.4A and
shading both sides lowered it further still, it was still charging
at around 0.1A (100mA) though. Further testing at home returned
similar results – well over half an amp in the autumn sun but still
producing power in low light conditions.
The panels used in this array are amorphous – they are not as
efficient as mono or poly panels, however, they are cheaper to make,
are not affected as much by high surface temperatures and are still
able to supply usable electricity when it’s cloudy. It’s all a
compromise though, a mono panel with the same area as the
TopRaySolar unit would probably produce twice the power output (and
charge your battery twice as fast) however they cost much more.
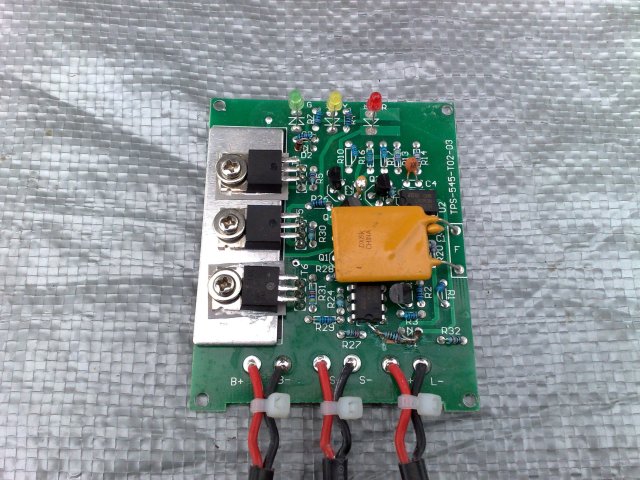
The charge
regulator is a Chinese number, similar to the cheapies seen on eBay.
The specs rate it to handle 7amps – not sure I would hang a 100Watt
panel off it though. It has flying connections for solar panel
input, battery charge output and load output. As noted above, these
all have the same style connector and if one wasn’t watching what
they were doing could plug the wrong lead in.
It has three
LED's to indicate battery status – high voltage, low voltage &
charging. There is some disparity with the specifications between
what is written on the provided instruction sheet to that shown on
the regulator itself; so, using an adjustable regulated DC power
supply, I ran the regulator through its paces. It performed as it
should with the following results:
Overcharge – cuts off solar input at 14.35 volts, reinstated when
battery gets below 13.25 volts.
Undercharge – cuts off load output at 11.0 volts, reinstated when
battery rises above 12.0 volts.
11 volts is
probably far too low for the regulator to cut out on a deep cycle
battery, even if it’s under heavy load at the time. However, this
doesn’t concern me too much as we don’t have an expensive deep cycle
battery and we’re unlikely to flatten it to anywhere near that point
anyway. With a bit of knowledge one could modify the regulator to
cut out sooner, but then again if you are trying to protect a $300
battery you wouldn’t use a $20 regulator
Here’s a look
inside for those interested:
While the
screwdriver was out I pulled the bezel off the left hand panel of
the array to check out the wiring. As suspected the 12/24 volt
switch on the front just switches the two panels between parallel
and series. In 12 volt mode the two panels are paralleled to produce
more power (watts), while in 24 volt mode they are run in series to
produce more voltage, obviously in this mode the array will only
make half the claimed power (6.5 watts). I doubt we’ll ever need 24
volt output so I just may rewire it as an on/off switch.
There is a
blocking diode fitted to the negative output line to stop voltage
returning back to the panel if left connected when there is little
or no light. I’m guessing the blue LED is meant to stay on or flash
depending on the array voltage (the instructions just say it’s a
“charging indicator”), however, I think the internal circuitry is a
little haywire as it just does what it wants, when it wants!
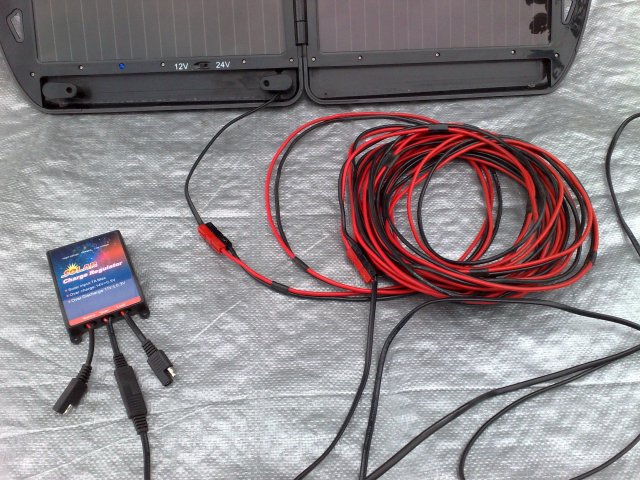
As stated earlier, the attached lead is just three metres
long. In our case, with where the battery is positioned, it’s just
too short to be able to move the array around and catch sun all day.
One of the CamperTrailers Group members generously gave me some
heavy wiring from when he upgraded his own solar setup (thanks
Paul!) I cut the existing lead near the array and fitted Anderson
PowerPoles to both ends and then made an extension lead using the
donated wire. The array can now be positioned up to 13 metres away
from the battery/regulator with negligible voltage drop.
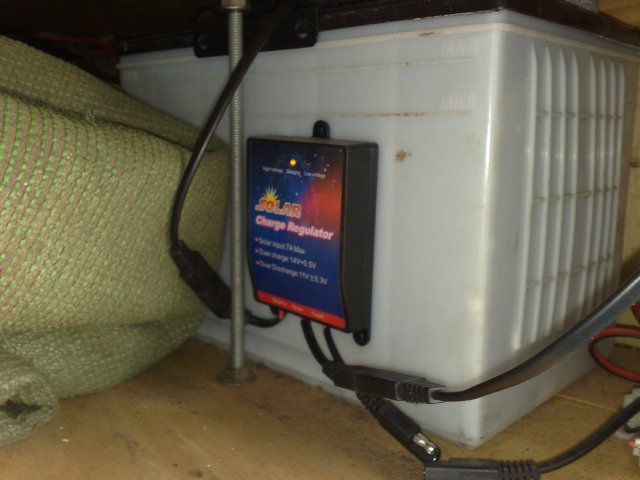
I can see why
one may want to use the included male cigarette lighter socket to
power items, but I feel the female offering is redundant. I cut the
cigar plug off and connected the regulator plug wire permanently
into the trailer wiring. I still have more to do with the trailer
wiring so for the moment the regulator is simply attached to the
side of the battery with double sided tape.
In conclusion;
I’m very happy with the package, it does what we need it to do and
the price was right. I would recommend it to anyone needing a low
wattage panel & regulator (low voltage cutout issue aside) to keep
their camper battery charged. There is also another version of this
package which uses the same array but includes a battery pack
instead of the regulator. It has cigarette lighter socket(s?), 5
volt USB outlets and a facility to connect another battery. I’m not
sure on the capacity of the pack. One of our members purchased this
setup at K-Mart a year or so ago.
thanks to Dirk for sharing this
info
april 2010
|