|
Mike & Christine's Tvan

INTRODUCTION
Our current camping set
up is designed to cater for just two adults and therefore will not suit
everyone. Like most campers, our requirements have changed over time. In March
2006 we bought a second hand
Tvan.
Prior to that we spent 8
years sleeping in the back of our modified Land Rover Defender and towing a
custom built box trailer for storage of camping items. The previous 15 years was
conventional tent camping.
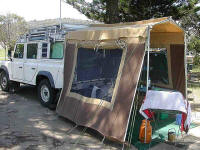
LAND ROVER DEFENDER
TDi
I mention the 4WD because it is still an integral
part of our camper set-up. On short trips we still sometimes use the 4WD by
itself and sleep in the back. From the outset I removed the rear seats and built
a false floor for a bed mattress with drawers underneath. An Engel 39L fridge is
permanently installed in the 4WD, together with a deep cycle battery and solar
panel mounted on the roof.
Most of our main camping
gear (plates, cutlery, portable stove etc) stays in the vehicle and so the only
things we generally need to pack for a trip are food , table and chairs, and
clothes. Having most things in the car helps for roadside stops for lunch, day
site-seeing trips and picnics.
We made a rear awning
from our old tent that is supported by horizontal bars that slide out from the
roof rack. Christine made a fly screen that fits over the back door to keep out
mozzies. I made two removable vents that fit in the rear windows to provide air
flow for the fridge and us when sleeping. Anyone with back copies of 4WD Monthly
magazine can read a more detailed write-up in the January 2003 edition.
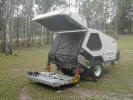
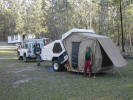
TVAN
Our Tvan is a 2004 ex-hire van. It has the long draw bar, AT35 coupling,
electric brakes, battery, 50W solar panel, 240V and 12V power outlets, two gas
cylinders, 70L water tank, and roof storage nets.
We chose the Tvan because it seemed the next logical stage to our camping. It
retains the advantages of sleeping under hard cover but with more room, has a
tent area for extra cover in inclement weather, and the ability to go anywhere
the 4WD can. We particularly like the different ways it can be set up namely:
 For overnight stops, or if the weather is fine, the easiest
option is to drop the tailgate/floor half over, lift the back door, and put the
insect net over the back opening. You can pull down the back door partly, or
fully if the weather turns really bad.
For overnight stops, or if the weather is fine, the easiest
option is to drop the tailgate/floor half over, lift the back door, and put the
insect net over the back opening. You can pull down the back door partly, or
fully if the weather turns really bad.
If you need more privacy, somewhere to sit away from bugs, or the weather is not
so good, you drop the tent and attach it to the floor. No poles or guy ropes and
takes about 5 minutes.
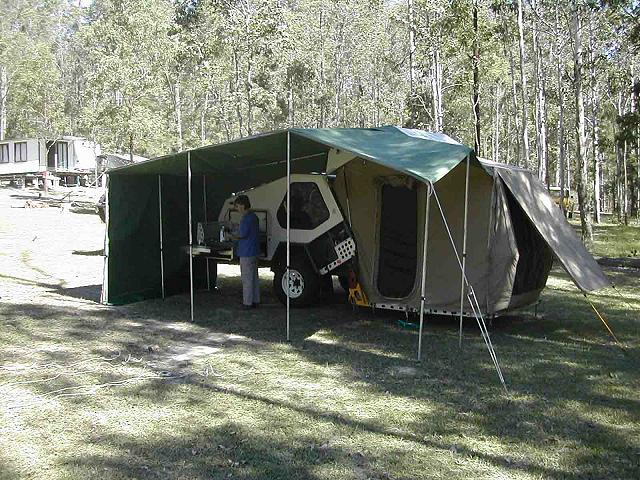
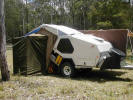
 If you are staying somewhere for a few days it can be worth putting the awning
on the side of the van for shade and/or rain protection, particularly for
cooking. This can be fiddly as it needs 6 poles and guy ropes and probably takes
about 45 minutes to set up. Tvan also provide full sides for the awning which is
probably the way to go if you have a family.
If you are staying somewhere for a few days it can be worth putting the awning
on the side of the van for shade and/or rain protection, particularly for
cooking. This can be fiddly as it needs 6 poles and guy ropes and probably takes
about 45 minutes to set up. Tvan also provide full sides for the awning which is
probably the way to go if you have a family.
Tvan also provide a triangular shade sail that can be used for limited
protection if you do not want to put up the full awning, but we do not have
this.
The other option is an ensuite tent that zips onto the side of the tent area.
This is useful for showering and can be utilised as a cooking area in bad
weather using a small portable stove.
We have made a number of modification to our set up to suit us, namely:


A simple shade/fly sheet that clips onto the
middle of the roof and is pulled over the open back door. This provides some
privacy and shade if you are not using the tent, or with the tent down provides
extra protection for the canvas and helps to keep it cooler inside. One other
advantage is that you can have one of the roof ventilation hatches fully open
even if it rains heavily.
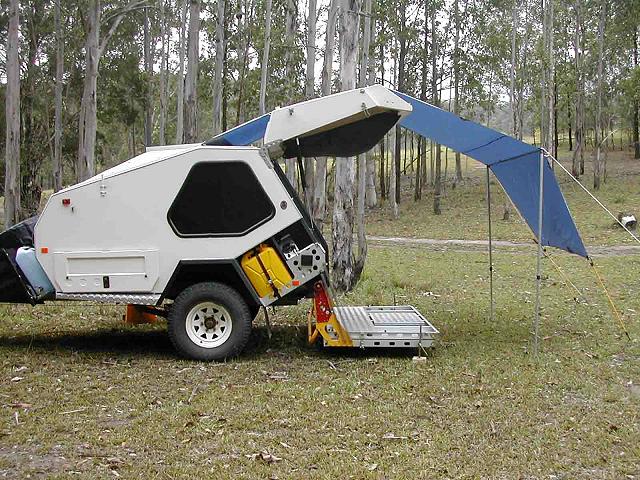
A smaller side awning from our old tent awning for the side of the Tvan instead
of getting the sail. This is smaller than the standard awning. It requires just
3 poles, can be used with or without the tent deployed, and is much quicker to
put up than the full awning.
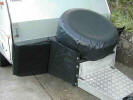

The
standard wheel cover/stoneguard was badly shredded so we replaced it with a conventional wheel
cover. Christine made some stoneguards out of shadecloth that can be easily
removed for access to the gas bottles. We also extended shadecloth at an angle
over the front of the metal stoneguards that protect the fuel carriers.
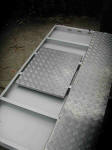
Checkerplate over the drawbar to give extra protection and make an area on which
to stand things. 
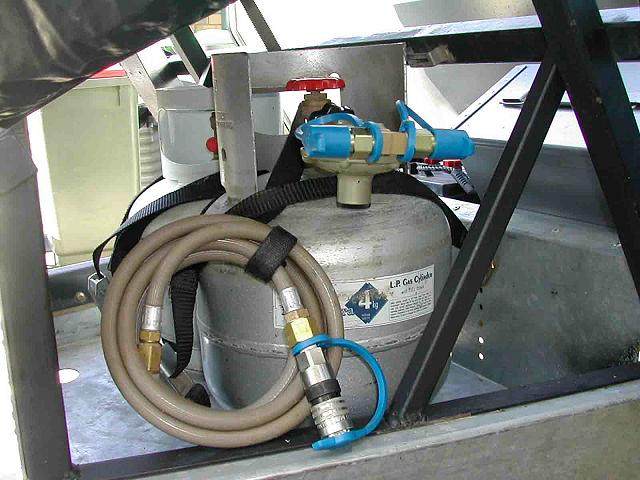
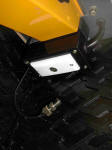
A 'T' piece and two snap-on connectors have been added to the LPG cylinder. This
allows us to easily remove the stove fuel line when travelling. The second
outlet is used for a wok burner when you need a lot of heat when cooking/boiling
water.
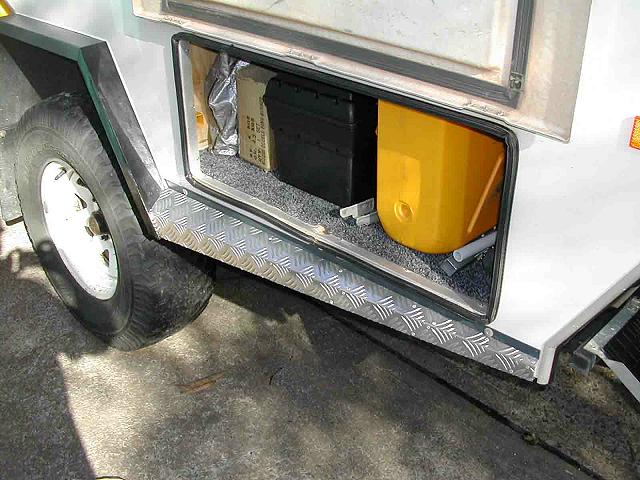
The Tvan has three
‘fuel’ carriers across the front. We use one for drinking water using a 20L
plastic can with a metal tap. I have fitted a metal screw cap on the tap to keep
out the dust. As the middle carrier is difficult to access I installed an
ex-army ammunition box which is waterproof and is used for storage of liquids
such as metho, turps, etc. and ‘dirty’ items. The third carrier is used for a
rubbish bin. The bin is an old metal fuel can modified with a hinged lockable
lid. This keeps the wildlife out of the rubbish and if empty can also be used as
extra storage when travelling.
Checkerplate and rubber is rivetted/glued to the wheel arch guard areas for
extra stone/bash protection.
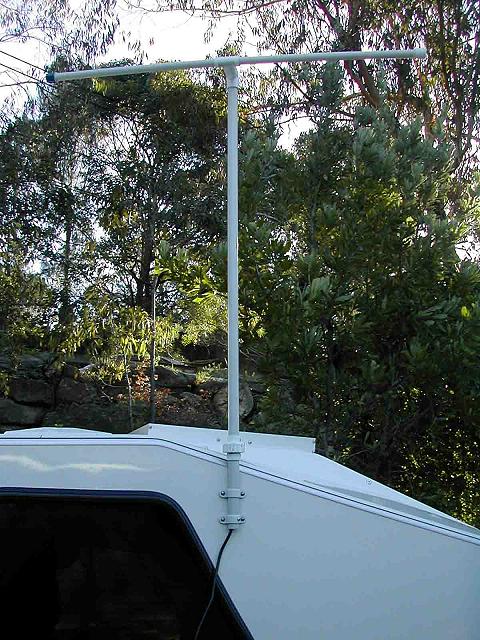
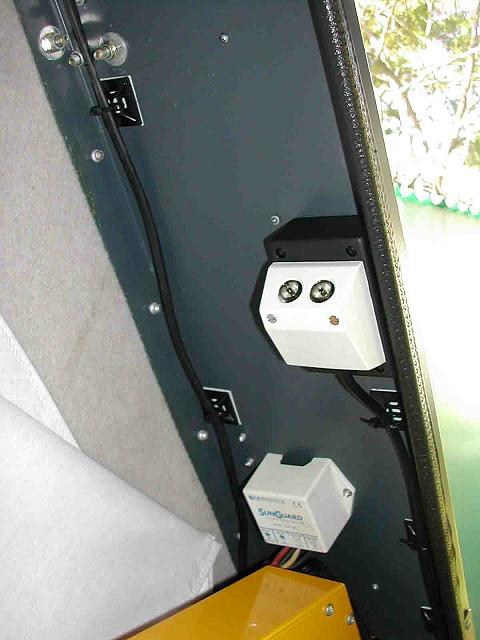
For those longer trips
we take a small portable TV. I put the ariel bracket on the side of the Tvan for
the folding ariel that plugs into an ariel inlet mounted near the 240V inlet.
This has a dummy plug to keep out dust when not in use. A similar ariel plug is
mounted inside the CT. The TV itself sits on a removable tray that hangs from
chain attached to brackets on the roof hatch surround.


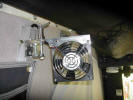
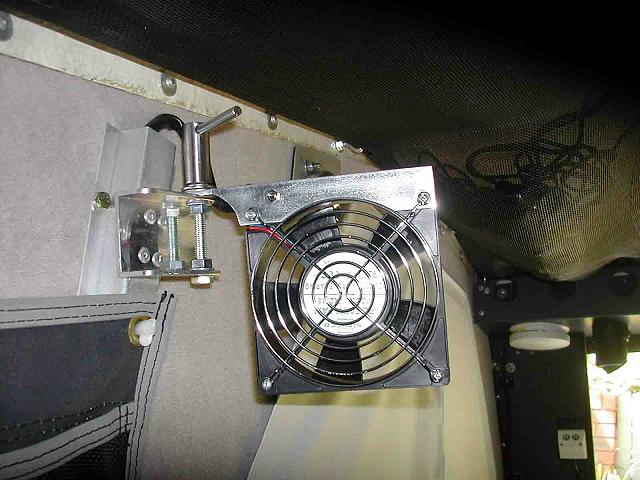
Computer fans to provide ventilation on hot nights have been mounted in custom
built holders that can be swung through 180 degrees for adjustment and storage.
These are wired in parallel/serial mode for fast/slow running via a master
switch.

Mike's
fans>>>>>
An extra ‘power box’ inside the van at the front. This has two 12V power outlets
but primarily is the fuse box for the extra electrical items such as fans and
lights.
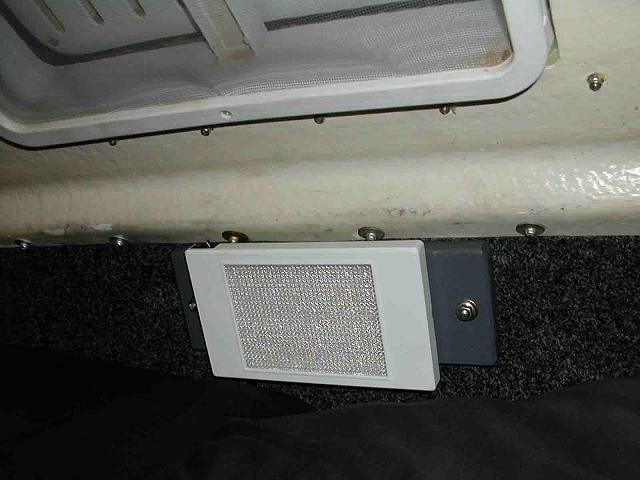
I made a kitchen light holder that holds a 48 LED light. This fits onto a
bracket on the side of the van. It can be swung and adjusted as a general
purpose light and also fits onto a clamp for use on a table etc. I was so
impressed with the LED I also fitted one on the inside front panel for reading
at night in bed.
Mike's LED >>>>>

A jockey wheel steering rod is stored on a bracket behind the wood carrier.
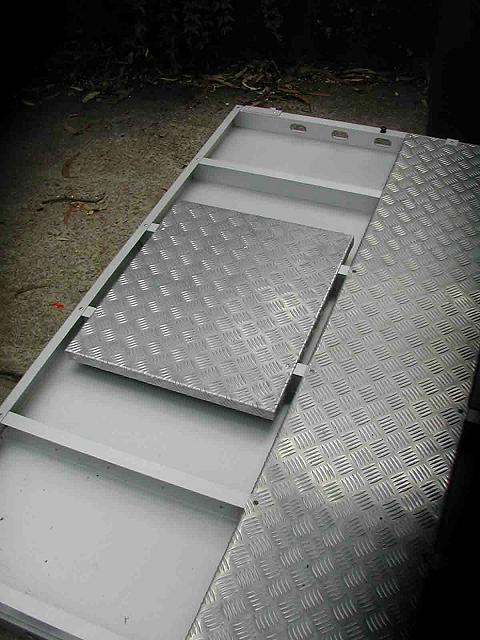
Checkerplate was added to the underside of the rear floor stage to help access
when the floor is only half out.
A plastic drink holder was added near the water hand pump to hold liquid soap.

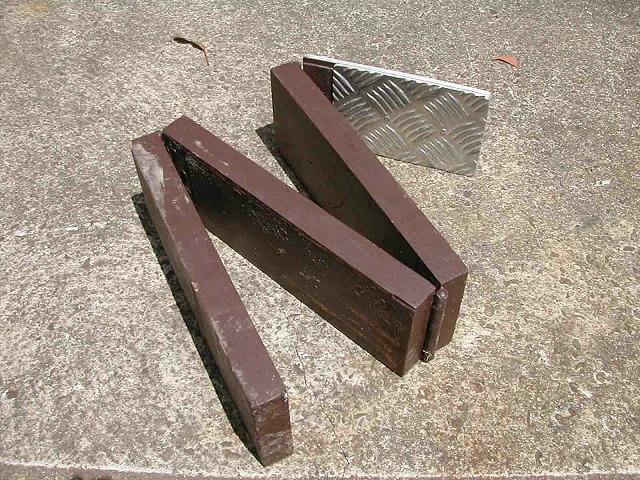
I found the floor supports difficult to store so added a support inside a tool
box to store them securely.
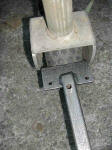
A few ideas not directly relating to the Tvan are as follows: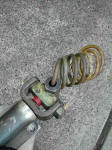
A simple way of securing the coupling is a motor
cycle cable

If you need to level the van a DIY Camper Leveller is described in technical
tips
DIY Leveller>>>>>
If you forget what the keys are for ………
I still have a few ideas/jobs to work on for the Tvan including
thanks to Mike Sargeant for showing us his Tvan
|